- Author admin [email protected].
- Public 2023-12-16 16:46.
- Last modified 2025-01-23 11:19.
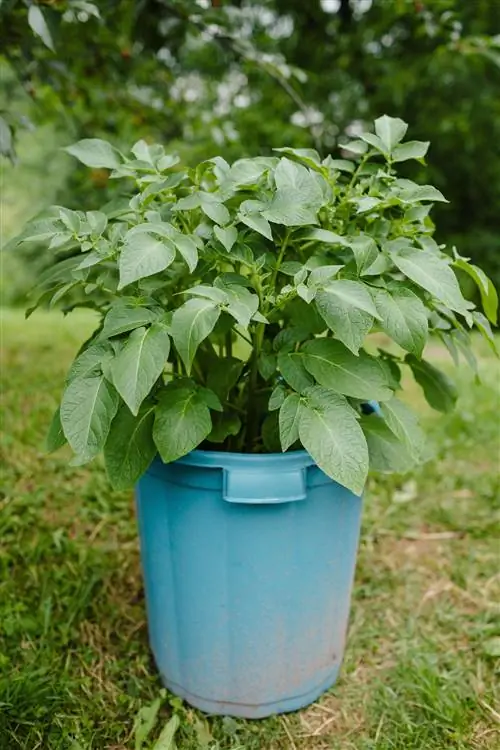
Growing in a pot is a space-saving way to harvest potatoes on the balcony or terrace. A wide pot that is filled with a mixture of leaves, small twigs, compost and rock dust is recommended for cultivation. To ensure that the potato has enough space to grow, only one seed potato should be planted per pot.
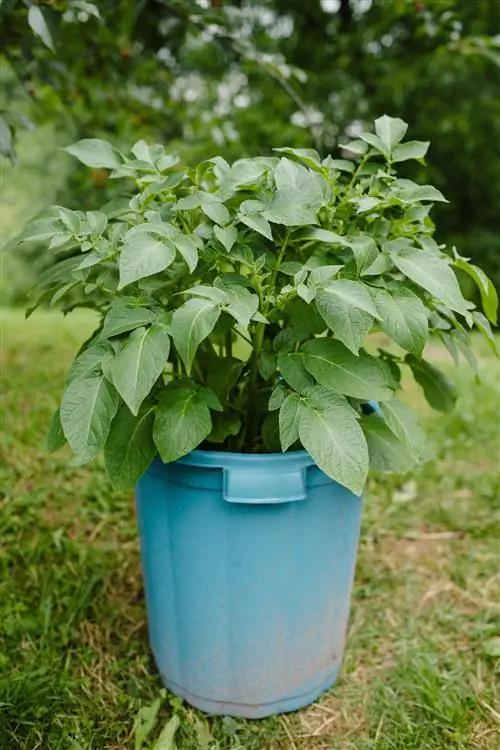
How to plant potatoes in pots?
Potatoes are planted from the beginning of April to the end of May. The pot should hold at least 20 liters. The pot is filled with a mixture of leaves, small twigs, compost, garden soil and sand. Fertilization is done with sheep's wool pellets or manure
Quick guide: planting potatoes in a pot
Potatoes can basically be planted in different variations. In addition to cultivation in beds, cultivation in plant bags or pots is also extremely popular. The immense advantage of the latter variants lies in the small space they require. This makes it easy to plant potatoes on the balcony or small terrace.
And this is how it works:
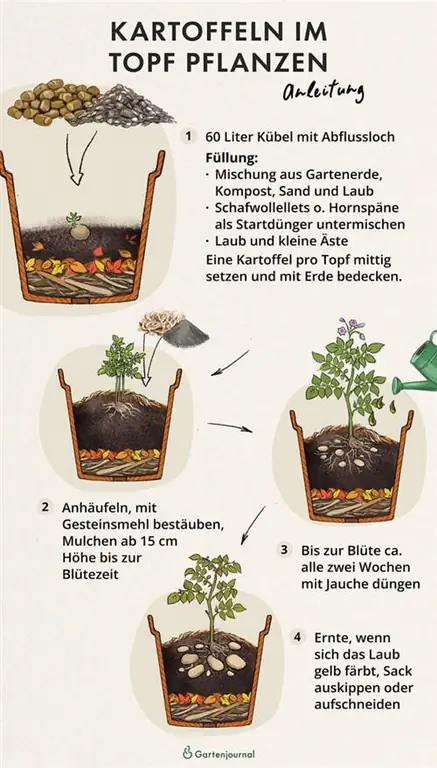
- Choose a bucket with a capacity of at least 20 liters (better 60 liters)
- Insert a drain hole in the floor (if not already available)
- create the bottom layer of twigs and leaves
- Fill the soil layer with garden soil, compost, leaves and sand
- Insert potato bales with starter fertilizer (e.g. horn shavings or sheep's wool pellets)
- cover planted potato with soil
- hill up and mulch two to three times from a height of 15 centimeters until flowering
- Additional fertilizer every two weeks (manure, manure,)
- Harvest potatoes by tipping the pot when the leaves change color
Preliminary considerations
Before the actual planting can begin, a few preliminary considerations need to be made. In addition to the right location, choosing the right type of potato plays a major role.
Choosing the right type of potato
Not all potato varieties are suitable for growing in pots or buckets. Because of the limited space, tall and spreading varieties in particular are not recommended. The division into early and late potatoes is of minor importance for cultivation. Nevertheless, some essential information is important when choosing a variety.
New potatoes usually take between 90 and 140 days to mature. Due to the shortened growth process, the susceptibility to diseases is lower. However, these varieties have a significantly reduced shelf life. They should therefore be consumed as soon as possible after harvest. The growing season for late potatoes, on the other hand, is between 140 and 160 days. However, the longer duration is associated with an increased susceptibility to illness. Due to the improved shelf life, these varieties can be enjoyed significantly longer than early potatoes.
Early potatoes: Agata, Annabelle, Berber, Eerstling, Rote Emmalie and La Ratte D`Ardèche are suitable as early potatoes.
Late potatoes: Ackersegen, Bamberg croissants, Danish asparagus potatoes, Granola, Palma, Vitelotte Noire, Violette D`Auvergne are suitable for late potatoes.
The ideal location
As a nightshade plant, the potato prefers a sunny and warm location. Afacing southis ideal so that the plant receives as many hours of sunshine as possible. Aweather-protected location is also recommended. Even if the potato itself is very robust, wind and rain increase susceptibility to disease.
Preparing the planter
Choosing the right planter is crucial for a good harvest. In addition to the size and presentation, the content, the substrate, should also not be neglected.
Size and material
The potato tuber needsa lot of space for its growth The potato pot should therefore have a capacity of at least 20 liters. This roughly corresponds to the dimensions 33 centimeters x 30.5 centimeters x 29 centimeters. However, this information only represents the absolute lower limit. A bucket with a volume of 60 liters offers significantly more space. You can achieve this capacity with a container measuring 72 centimeters x 37.5 centimeters x 30 centimeters. However, there are no upper limits when it comes to size.
The material of the plant pots ranges from plastic to clay to fiberglass. Plastic pots are particularly suitable for growing potatoes, as the tubers can be easily harvested by tipping the pot over. Additionally, choosing a plastic pot makes it easier to add drainage holes to the bottom. These can be made with little effort by simply piercing. The bucket from SEEBAUER (€29.00 at Amazon) is very suitable for growing in pots due to its width of 50 to 60 cm. It is available in different colors.
The right substrate
Potato plants prefer aloose soil consistency. This prevents the development of waterlogging and the resulting illnesses. Due to its highly consuming properties, it also requires a high proportion of nutrients. Nitrogen in particular is needed in large quantities throughout the entire vegetation process. When planting, a maximum pot filling of 75% is recommended. Due to the height growth of the plant and the subsequent piling up of soil, a distance of at least 10 centimeters should be maintained to the edge of the pot.
An ideal combination results from a mixture of rock dust, compost, leaves and sand. While the sand fundamentally loosens the substrate, the rock dust binds excess moisture. However, through contact with the roots, the liquid can also be released back into the plant. In this case, however, only in the quantities actually required.
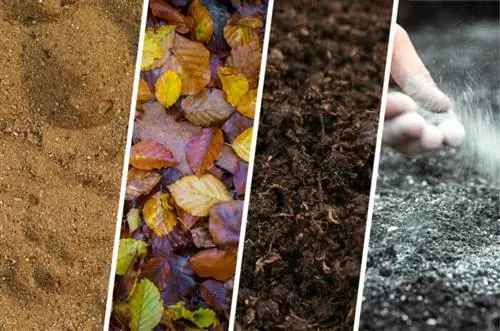
Both compost and leaves act as natural fertilizers. The nutrients contained in the compost can be used directly by the potato through the advanced rotting process. The leaves are increasingly decomposed by the microorganisms contained in the compost and are then also available as compost for fertilization.
Tip
Under no circumstances use soil that has already been used for growing potatoes. This promotes the spread of undesirable diseases among the nightshade family. Alternatively, the substrate can be used for various purposes. You can find an overview here.
Sowing potatoes
After all preparations regarding the planter and the substrate in it have been completed, sowing the potatoes begins. Both pre-germinated and non-germinated tubers can be used for planting. The advantages of pre-germination and instructions can be found here.
Number, planting depth and planting distance
It is recommended to plant onlyone seed potato per pot. An exception are particularly large buckets with a filling volume of over 150 liters. In this case, filling with several tubers is possible without hesitation. However, make sure there is a sufficient planting distance ofat least 30 centimeters Otherwise there is a risk of inadequate development of the individual plants.
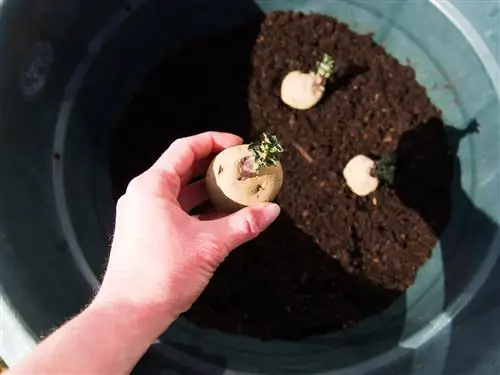
The larger the width of the planter, the more seed potatoes you can plant. Normally, however, one potato placed in the middle is sufficient.
Basically, the potato tuber should be covered with a layer of at least 10 cm. The exclusion of light stimulates general growth in the form of shoot and root formation. However, this information primarily applies to pre-germinated potatoes. Potatoes that have not yet sprouted should only be covered halfway. An appropriate light intensity is required to initiate and maintain the germination process. This is not achieved with complete coverage.
Piling the potatoes in the pot
Hilling potatoes is an important care measure in nightshade cultivation. It is therefore recommended not only for planting in pots, but also for other forms of cultivation. We have put together an overview of the advantages of piling up in this article.
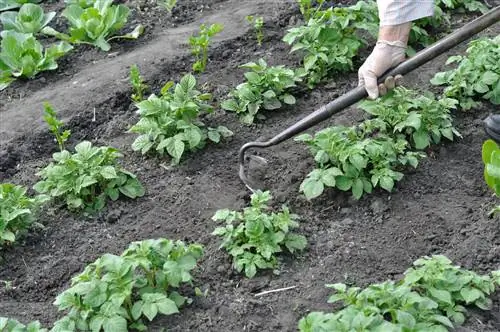
Potatoes in the pot can be piled up by hand. The earth is pulled towards the trunk.
The following is some basic information about the piling process:
- Start: from a height of 15 cm
- End: with the blossom
- Frequency:two to three times per growing season
- Recommended tools: digging fork, rake or shovel
- Height of the pile: maximum 20 centimeters
The continuous accumulation of soil around the plant occurs with the substrate already present. The addition of other materials is usually not necessary. Permanent piling up every two weeks has no advantages.
Caring for potato plants
In addition to the piling up already described, irrigation and fertilization are among the essential care measures.
Water regularly
To avoid waterlogging, be careful when watering. In addition, excessive wetting of the leaves increases the risk of disease and pest infestation. To better dose the amount of water, a watering can should be used instead of a garden hose.
In addition, it is recommended to regularly check the moisture content of the substrate using a finger test. In this way, over- or under-supply can be ruled out. If there is only dry soil at a depth of five to seven centimeters, it makes sense to water again. As a rule of thumb, weekly watering is recommended. More often in the summer months depending on the temperature.
For optimal water absorption, it is also advisable to water the potatoes in the morning or evening. The sunlight causes both the pot and the substrate to heat up significantly. Water that hits it is much more difficult to absorb and pass on to the plant. Pay attention to this note, especially in summer.
Fertilizing potato plants
A variety of organic and mineral fertilizers are available for fertilizing potato plants. In any case, it is important to incorporate the materials correctly to ensure their usability. The ideal incorporation is achieved from a depth of ten to fifteen centimeters.
In practice, rock dust and sheep's wool pellets have proven to be effective as starter fertilizers. These dwindle in the long term. Nettle manure is recommended as a follow-up fertilizer for heavy feeders. This is applied in liquid form, which makes nutrient absorption much easier. But other fertilizers can also be used without hesitation. These include
- Compost
- organic liquid fertilizer
- animal dung
If you don't have any Jauch available, you can also buy it ready to pour.
Harvesting potatoes
Harvesting the potatoes grown is easy. It can only be difficult to recognize the right time. Only in a few varieties can it be recognized by the dried flowers and leaves. The majority show no signs of the above-ground parts of the plant dying until late autumn. It is therefore important to take into account the usual ripening times of the individual potato varieties. Early potatoes should therefore be checked after 120 days at the latest and late potatoes after 160 days. The test should ideally be carried out by a test dig in which a few tubers are removed.
A ripe potato is characterized by the following properties:
- easy detachment from the root
- firm consistency of the shell, no scraping possible
After a successful test excavation, the bucket can basically simply be tipped over. Depending on the size and weight, it may also make sense to uncover the individual potatoes with a digging fork.
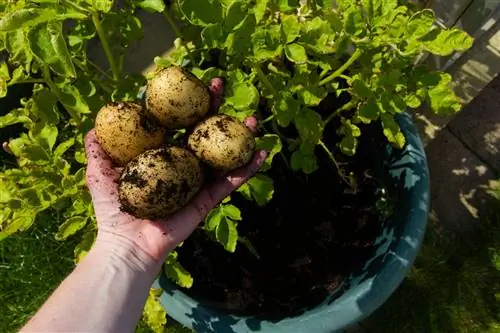
Potatoes can be partially dug up to test for ripeness.
Problems, diseases and pests
Despite good care, the risk of infection with a fungal or bacterial disease or pest infestation can never be completely ruled out. Below we have put together the most common problems with potato plants.
Green tubers:Green tubers are created when the potato comes into contact with light and air. The green appearance is the result of beginning germination. Lack of or improper accumulation of soil around the plant is the cause of the formation of green tubers. Green potatoes arenot suitable for consumption, but make excellent seed potatoes for next year.
Waterlogging: Waterlogging is one of the most common rot diseases in plants. Excessive watering encourages the development of wet rot bacteria. This in turn causes the tubers to rot and increases susceptibility to other diseases. Areas that have already been affected can no longer recover. To reduce the risk of infection, they should be removed as quickly as possible. In addition, it is recommended to create a good drainage layer as a preventative measure to drain away excess water.
Blight and brown rot:Late blight is a fungal disease that is often transmitted through moisture. Curled and brown-spotted leaves are characteristic. Treatment of the disease is only promising in the early stages with a fungicide. If the infestation has progressed too far, the only solution is to remove the affected parts of the plant or to dispose of the plant completely. The potatoes shouldno longer be consumed.
Potato scab: Potato scab is usually only discovered during harvest. The tubers then have scabby spots on the surface, but these also extend into the interior of the tubers. The cause is also a fungus that lives in the soil. Despite the external changes, the potatoes are suitable for consumption except for the affected areas. However, the storage life is severely limited due to the further spread of the spores. Follow-up treatment is not possible. Therefore, as a preventative measure, ensure that your plants are adequately watered and avoid the use of lime-containing products.
Blackleg:Blackleg is a bacterial disease of the above-ground parts of plants. The pathogen is spread by damp and cold weather. The first sign of the disease is the black-brown rot of the main shoot from below. An effective treatment is not yet known. If the disease occurs, onlyDisposal is possible.
Potato beetle: The Colorado potato beetle is very dangerous both as an adult beetle and as a larva. The brown and white striped beetles and their red and brown colored caterpillars are characterized by their enormous appetite. In addition to the above-ground leaves, the underground tubers are also affected. Control is possible by manually collecting the individual animals or by using pesticides.
Tip
Plant parts that are affected by fungi or bacteria must under no circumstances be placed in the organic waste bin or on the compost. This promotes reinfection and spread.
FAQ
How to plant potatoes in a pot?
After you have chosen a suitable pot (at least 20 liters), it is filled with a mixture of twigs, garden soil, compost, leaves, sand and starter fertilizer. Then the potato tuber is placed in the middle and covered with a layer of soil.
When are potatoes planted in pots?
Typically, potatoes are planted between early April and late May. Depending on the variety chosen and the desired harvest time, the date can be chosen flexibly. However, it should be noted that the seedlings are sensitive to frost and can only tolerate temperatures below seven degrees for a short time.
When are potatoes harvested in pots?
The harvest time for potatoes depends on the planting date and the variety. Early potatoes can be harvested after 90-140 days, late potatoes only after 140-160 days.
Which varieties are suitable for planting in pots?
The varieties Agata, Annabelle, Berber, Eerstling, Rote Emmailie, La Ratte D`Ardèche (all early potatoes), Ackersegen, Bamberger Hörnchen, Danish Asparagus Potato, Granola, Palma, Vitelotte Noire and are suitable for planting in pots Violette D`Auvergene (all late potatoes).

