- Author admin leonars@hobbygardeners.com.
- Public 2024-01-10 23:11.
- Last modified 2025-01-23 11:22.
The Indian banana is still a rarity in the garden in this country. Little is therefore known about their reproduction. In fact, not every common method can coax a new plant out of it. However, seed propagation is also possible for hobby gardeners.
How do I grow an Indian banana from seeds?
To grow an Indian banana from seeds, the seeds must first be cold stratified for 100 days, then sown in potting soil and kept warm. Germination takes about two months and the young seedlings should be placed in partial shade and planted out in the second year.
Seed collection
Ripe Indian bananas are not part of the supermarket range. It is questionable whether this will change in the foreseeable future. If you are looking for a fruit to get seeds from, you may have to look longer.
A few farmers' markets offer these fruits. You can also occasionally find a shop online that can deliver fruit. Maybe you already have a specimen in your own garden or know another tree owner.
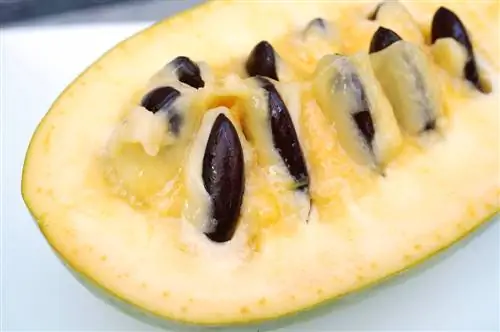
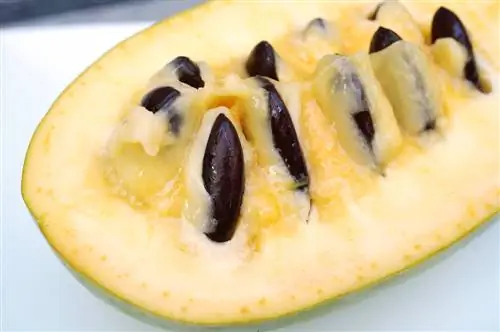
Cut the fruit and get the seeds out. Before sowing, you must wash them thoroughly to remove any pulp residue.
Buy seeds
If you don't have fruit available, you can buy seeds. They cost the equivalent of around 50 cents each. The easiest way is to order them online.
Optimal time for propagation
The propagation of the Indian banana from seeds is a lengthy process. The first step should ideally begin in autumn.
Stratify
The seeds of the Indian banana are cold germinators. This means: Before they germinate, they must first be exposed to a longer period of cold. In this case that means:
- Cold stratify seeds for approx. 100 days
- the required temperature is between 2 and 6 degrees Celsius
- plant seeds in moist soil
- Put pots outside
- alternatively stratify in the refrigerator
- Put the seeds with sand in a bag and close it
Tip
Stratifying outdoors can only be successful if the winter is consistently cold. Because temperature fluctuations can prevent germination or delay it until next year. With the constant temperatures in the refrigerator you are on the safe side.
Sowing
After stratification, the seeds can be sown. This is done in standard potting soil (€6.00 on Amazon). This should be sterilized beforehand in order to destroy any fungus gnat larvae and other pests that may be present. Adding some sand is also recommended.
After sowing, the pot must be kept warm. Temperatures above 20 degrees Celsius are ideal. It can then take another two months or even longer for germination. During this time the earth must never dry out completely.
But even after germination there isn't much to see above ground. Because the future tree focuses first on the development of its taproot. So it can take a few months after sowing until the first green appears.
Young seedlings
The young tree can spend its first summer outdoors. But while the adult tree loves sun, it needs to be in partial shade. However, the first winter must still take place in a frost-free winter quarters. In the second year you can plant the tree.
Note:Plants grown from seeds are individual specimens. While the taste of the fruits is good in most cases, their size can vary. If necessary, further refinement can be carried out.

