- Author admin leonars@hobbygardeners.com.
- Public 2023-12-16 16:46.
- Last modified 2025-06-01 06:02.
To thrive in the eternal twilight of the rainforest, orchids have developed a clever survival strategy. So that they can absorb sunlight, the plants sit at a lofty height on the branches and cling to them with their roots. The bulbs make a valuable contribution to the supply of leaves and flowers. Read here what bulbs actually are and when to cut them.
When and how should you cut orchid bulbs?
Orchid bulbs should be cut in early spring when they are shriveled and dried out. The orchid is unpotted, dried bulbs and aerial roots are cut off with a disinfected scalpel and the cuts are dusted with cinnamon or charcoal powder.
What are bulbs actually?
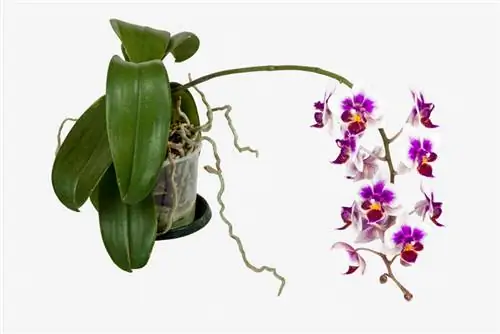
As epiphytes, orchids use their roots to hold onto branches or rocks. With their aerial roots they extract vital moisture and nutrients from the rain. So that epiphytic orchids do not have to live from hand to mouth, they produce bulbs for storage. These are thickened shoot parts that serve as storage organs for water and nutrients. The leaves and flower stems sprout from these.
Cut bulbs professionally - this is how it works
As long as a bulb thrives plump and green, it carries out its vital task as a storage organ. Only when the tuber gradually shrivels and dries up can cutting be considered. Experienced orchid gardeners recommend pruning in combination with repotting. The best time for most types of orchids is a day at the end of winter. How to do it right:
- In early spring, pot the orchid with the dried bulbs
- Remove the used substrate to get a clear view of the root ball
- Cut off dried bulbs and aerial roots with a disinfected scalpel (€7.00 on Amazon)
- Sprinkle the cuts with cinnamon or charcoal powder
First fill the new culture pot with expanded clay balls as drainage and a first layer of fresh orchid soil. Put the orchid and its remaining bulbs back in there. Then add the remaining substrate over the roots and water.
Using backbulbs for propagation - This is how it works
As long as the bulbs from the previous year are not completely dead and dried up, they have the potential for propagation. Although these back bulbs have no leaves, they are only slightly shriveled and still have vital aerial roots. If you notice one or more returning bulbs when repotting, it is worth trying to encourage them to sprout again using the following measures:
- Fill a jar with sphagnum and moisten it slightly
- Place with the lid on in a partially shaded, warm location
- Air every now and then and spray with soft water
If new leaves emerge from the bulb, the experiment is successful. Before you repot the future orchid into normal substrate, at least 2 additional new roots should have developed.
Tip
Don't be confused by the different terms bulbs and pseudobulbs. Orchid gardeners usually speak of bulbs, although technically they are pseudobulbs. True bulbs are onions with multiple layers. On orchids, however, the tubers grow homogeneously (without shells). There is therefore no difference between the two names.

