- Author admin [email protected].
- Public 2023-12-16 16:46.
- Last modified 2025-01-23 11:21.
Having hedge trimmers sharpened is very expensive. Many do-it-yourselfers therefore prefer to buy a new one straight away. But you can also easily do the sharpening yourself. Find out how to do this below.
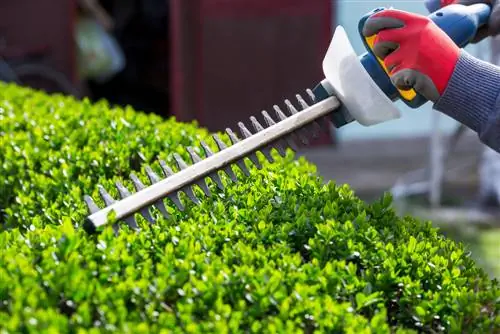
How can you sharpen a hedge trimmer yourself?
To sharpen a hedge trimmer, you should first remove the power source, disassemble the shears and thoroughly clean the cutting blades. With a manual hedge trimmer you use grinding stones, with a motorized hedge trimmer you use files. The parts must then be oiled and reassembled.
Types of hedge trimmers
Not all hedge trimmers are the same. Basically, two types can be distinguished: the manually operated hedge trimmer and motor-operated hedge trimmers that are connected to an energy source.
Manually operated hedge trimmers
Manually operated hedge trimmers look like oversized secateurs with a very long handle and longer, straight blades. Sharpening also works in a similar way to secateurs and is significantly faster than sharpening other types of hedge trimmers.
Motorized hedge trimmers
Basically three common types can be distinguished here:
- Petrol hedge trimmer
- Electric hedge trimmer
- Hedge trimmer with battery
For sharpening, it is irrelevant where the energy comes from; the cutting blades are very similar in all three cases. The cutting blade has numerous serrations, each of which must be sharpened individually. The work is therefore a bit arduous, but it is worth it. It is important that you remove the energy source before sharpening so that the hedge trimmer cannot start.
Sharpening motorized hedge trimmers
- File
- dry cloth
- Gloves
- maybe. Safety glasses
- Wooden block to place the cutting sheets
- or screw clamp to fix the hedge trimmer.
- Cleansing Oil
1. Caution first
First make sure that the hedge trimmer cannot start under any circumstances. To do this, pull the plug on an electric shearer, remove the battery on a battery-powered hedge trimmer and pull out the spark plug on a gasoline hedge trimmer.
You should also wear gloves to protect yourself from injuries. Safety glasses can also be useful.
2. Optional: Disassemble the hedge trimmer
If you can remove the cutting blades of your hedge trimmer from the holder, this has several advantages: You can sharpen both cutting blades much more thoroughly and easily and you can thoroughly clean both the cutting blades and the hedge trimmer body - both inside and out. In this article we will explain to you how to disassemble your hedge trimmer.
Once you have disassembled your hedge trimmer, place a cutting blade on a block of wood to sharpen and work on the part that protrudes beyond it.
If you do not disassemble your hedge trimmer, fix it as best you can, for example with a vice.
3. Sharpen cutting blade
Now place the file (€6.00 on Amazon) on the top point and file from top to bottom. Back and forth movements are not a good idea; always file calmly and evenly in one direction. Make sure you get the angle right! 15 to 20 movements per side should be enough. Then move on to the next prong and file all the prongs on the exposed side in one direction.
4. Sharpen the other side
If you haven't taken your hedge trimmer apart, the next thing to do is: Put the spark plug or battery back in or connect the hedge trimmer to the power supply. Turn it on briefly and stop it where the serrations cover the side you have already sharpened.
Now file the other side. Do not turn your hedge trimmer horizontally! This is not the back side but the opposite side of the serrations, so to speak right and left, which was previously covered by the second cutting blade.
If you have dismantled your hedge trimmer, you can simply sharpen the entire tine straight away.
5. Clean the cutting blade on the back
This step is only possible if you have disassembled your hedge trimmer, turn the blade over and file the entire surface to remove dirt and any rust.
6. Second cutting sheet
Now repeat the process with the second cutting blade.
7. Clean
Once you have disassembled your hedge trimmer, rub the shaft on which the cutting blades are attached with some sandpaper. Then spray or rub both cutting blades and the shaft with a little oil and rub everything with a dry cloth.
Otherwise, spray only the cutting blades with oil and remove any residue from filing with a dry cloth.
Cleaning manually operated hedge trimmers
- Wrench or screwdriver
- coarse and fine whetstone
- Container with water
- dry cloth
- Gloves
- Oil
1. Dismantling the hedge trimmer
Unscrew the hedge trimmer.
2. Clean
Remove coarse dirt with a brush, preferably a metal brush.
3. From coarse to fine
Dip the coarse whetstone in water or soak it in water for an hour before starting work. Then use it to sand the two cutting blades in a circular motion. Make sure you get the angle right!
Repeat the process with the fine whetstone.
4. Drying and oiling
Dry both parts with the dry cloth and then apply some oil and rub thoroughly.
5. Assemble
Now reassemble your hedge trimmer and apply some oil to the joints and screw connection.

