- Author admin leonars@hobbygardeners.com.
- Public 2023-12-16 16:46.
- Last modified 2025-01-23 11:20.
The impressive pampas grass is also considered an ideal container plant - if the right variety is chosen. In order to get Cortaderia selloana to grow and bloom, some care measures must be taken that differ from planting in the bed.
Can you plant pampas grass in a pot?
Pampas grass can be successfully planted in a container if you choose a smaller variety like “Pumila” and provide a sunny location. The bucket should have a capacity of at least 40 liters and be filled with a drainage layer and well-drained substrate. Regular watering and fertilizing are required for he althy growth.
Can you plant pampas grass in a pot?
Small varieties like the pampas grass “Pumila” grow easily in pots. It is important to have a filling volume of at least 40 liters, a drainage layer and a drain. Grass soil or a sand-soil mixture is suitable as a substrate. The bucket is fertilized with compost or organic liquid fertilizer after cutting in spring. For overwintering, the grass is tied together and the bucket is protected with jute.
Pampas grass in a pot
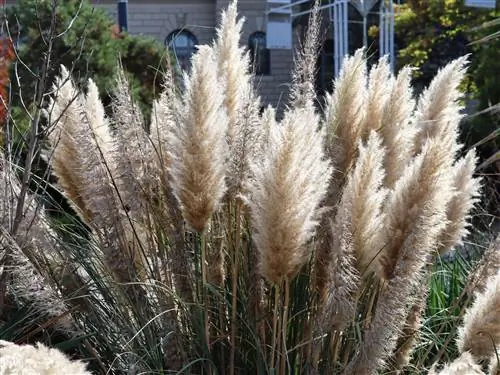
Pampas grass (Cortaderia selloana) is an exotic ornamental for open, spacious gardens. Although pampas grass is native to South America, it thrives just as well in Germany and survives even harsh winters in the bed. But the impressive perennial also grows in a pot - perhaps even on the balcony?
As a rule, nothing stands in the way of planting the decorative ornamental grass in a pot. In addition to the care measures, which are detailed below, basic properties of pampas grass - such as the sharp-edged leaves - should always be kept in mind.
Location
Pampas grass loves itwarm and sunny Accordingly, a location should be chosen where there are at least four to five hours of sunshine a day. Ideally this would be the south side of the house or an east balcony. In addition, a location that is protected from the wind and offers protection from the rain such as a canopy is also ideal.
If the wind is too strong, the stalks can snap; too much direct moisture on the nest can lead to rot. To really showcase the ornamental grass on social evenings, it's worth placing the bucket on a rolling board. This means it can be easily transported even during strong storms or for overwintering.
Planting pampas grass
Once a suitable location has been found, it's time to plant. Soil and substrate as well as the right plant pot play a major role. But the planting time should not be chosen arbitrarily either. If you pay attention to the details at the beginning, you will save yourself a lot of subsequent work.
Soil, substrate and plant pots
Cortaderia selloana prefers aloose, water-permeable substrate with lots of nutrients. Consequently, special soil for ornamental grass from the specialist shop or humus-rich soil from the garden are suitable. If the latter is too hard and clayey, it can be loosened up with a little sand. For drainage, the bottom of the pot should be lined with a layer of expanded clay or gravel. It is recommended to use a water-permeable fleece between the bottom of the pot and the drainage layer.
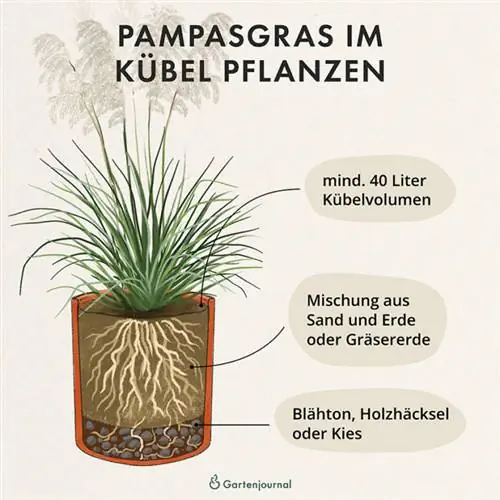
Choosing the right plant pot is particularly important. This should be at least40 cmin diameter and be able to hold at least40 L soil. Otherwise, the roots will not be able to develop far enough and will withdraw water from the substrate too quickly. The Vino plant vase from the quality brand Dehner is suitable, for example, as a bucket for pampas grass. For just under 20 euros you can get a robust flower pot with a ribbed look. The bucket is light and can be easily transported to winter quarters.
Planting time
The ideal time to plant pampas grass islate spring when there is no longer any threat of frost. This gives the roots enough time to work their way into the substrate before winter puts the plant into a dormant state. Pampas grass can still be planted later in the year. By mid-summer at the latest, however, it becomes difficult to meet the high water requirements of a stressed, freshly planted perennial.
Despite all the love, effort and care given to pampas grass, the inflorescences can be a long time coming. The fine panicles do not sprout until the second year after planting at the earliest. Until then you have to make do with the no less beautiful, long and curved stalks.
Repotting pampas grass
The ideal time to repot or divide and replant Cortaderia selloana is inlate spring, when there is no longer any threat of frost. The best substrate for pampas grass is grass soil from specialist retailers or a mixture of compost, universal soil and sand.
How to repot pampas grass:
- Preparation Prepare the old and new bucket. You will also need expanded clay, fresh soil, water, gloves and a shovel.
- Removing the pampas grass Carefully remove the pampas grass from the old bucket. The pampas grass is best pulled out in one piece at the bottom. Wear gloves.
- Tapping and sharing Knock off the old substrate as much as possible. Divide the pampas grass with a spade if it has become too large.
- Fill expanded clay Fill a drainage layer into the new bucket. You may be able to reuse the layer from the old bucket.
- Substrate and watering Fill in a few centimeters of new soil so that the pampas grass does not sit on the drainage layer. To do this, use compost soil as the first fertilizer if you don't have grass soil from specialist retailers on hand.
- Insert pampas grass Water the planting hole. Insert the pampas grass and fill the edges with soil. Then press the soil firmly and water again until the water runs out of the pot holes.
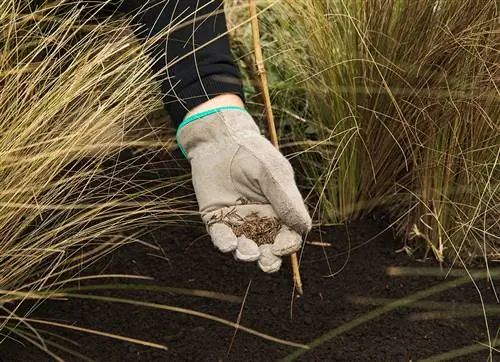
- Fertilization If you use grass soil, no starter fertilization is necessary. However, the first fertilization with compost or organic liquid fertilizer should take place one to two months after planting.
Care
If you care for it appropriately, the pampas grass will thank you with magnificent growth. Compared to outdoors, different rules apply in the pot regarding watering, fertilizing, cutting and overwintering. The biggest difficulty turns out to be correct water management. Pampas grass needs a lot of water, but under no circumstances should it suffer from waterlogging.
Pouring
For planting, the root ball should be placed wet in the planting hole and then watered well. Make sure beforehand that there are enough drainage holes in the bucket. Watering is only done around the pampas grass so that the “heart” (the eyrie) does not get any unnecessary moisture, otherwise there is a risk of rot.
Every other day The pampas grass should be watered, although it can survive short dry periods - but at the expense of flower formation and growth. As a rule, it is better to give a lot of water once rather than a little water all the time. Early morning or at sunset are the ideal times of day to water the pampas grass. Excess water should come out of the bottom of the holes.
Fertilize
Pampas grass does well outdoors with barecompost. In the bucket, however, the availability of nutrients is very limited. Adding compost or other organic fertilizers is not recommended because there are too few microorganisms in the soil that can break down the compost into usable minerals. But in order to form large flowers, pampas grass needs fertilizer.
That's why we recommend using aliquid fertilizer for pampas grass in the pot Liquid fertilizer In specialist shops there are appropriate products that have been specially developed for ornamental grasses, such as the grass fertilizer from Florissa. One month after the plant has grown well in the nutrient-rich soil, the liquid fertilizer can be diluted once or twice in the irrigation water. If in doubt, follow the manufacturer's instructions exactly.
Cutting
In most cases, the stalks and flower stems dry up completely during the winter months. This is nothing to worry about, but completely normal. The plant is dormant at this stage and continues growth in the spring. Because the leaves serve as protection in winter, pampas grass should not be cut back until late spring. The cut should be made approximately10 to 20 cm above the ground. Please make sure that no fresh stalks are injured.
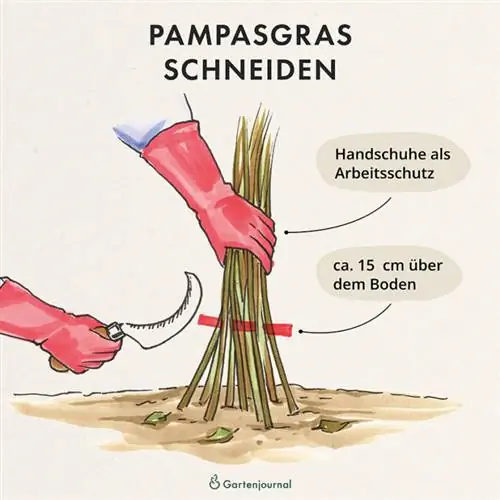
In very mild regions of Germany, pampas grass often stays green in winter. Then the pruning can be omitted and replaced with a thorough cleaning. In both cases - pruning and cleaning - gloves are mandatory as the leaves have sharp edges and can cause injuries.
Wintering
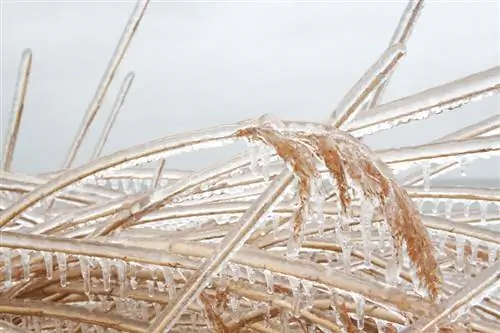
Pampas grass is consideredhardy In the open field, it is sufficient to tie the stalks together in a clump to protect the clump from moisture. It needs a little more care in the pot so that the pampas grass overwinters well. The time from which winterization preparations need to be made depends on the first frost (October/November). In the best case scenario, you place the grass and its pot in an unheated but bright greenhouse. There it is well protected from winter rain showers.
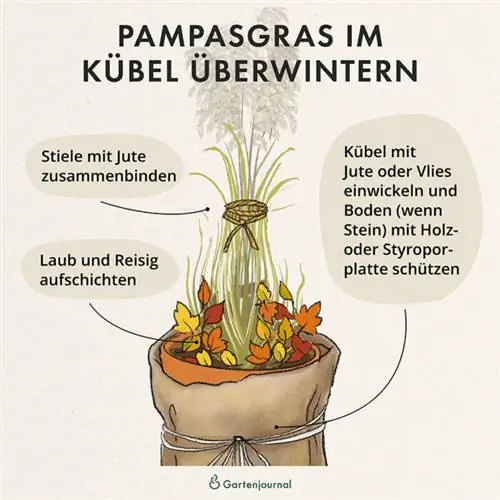
Otherwise you have to do something else: The bucket should be covered in bubble wrap or a jute bag so that the water inside doesn't freeze. To protect against the cold of the ground, the bucket should be placed on Styrofoam or wooden panels. To be on the safe side, we recommend tying the stalks of pampas grass in the pot together as additional protection. A canopy is recommended. However, the pampas grass should not be overwintered in the apartment because it is too warm there.
Pampas grass in the balcony box
Pampas grass is only suitable for the balcony under certain conditions. On the one hand, the balcony must be large and be able to hold the weight of the pot, soil and plants. On the other hand, children and pets should not have unsupervised access, as pampas grass has sharp-edged leaves, which often lead to injuries.
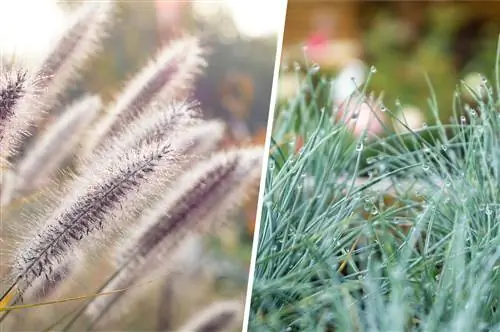
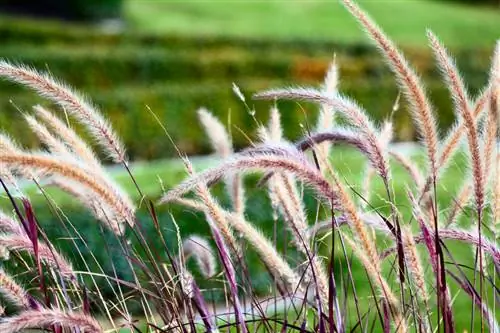
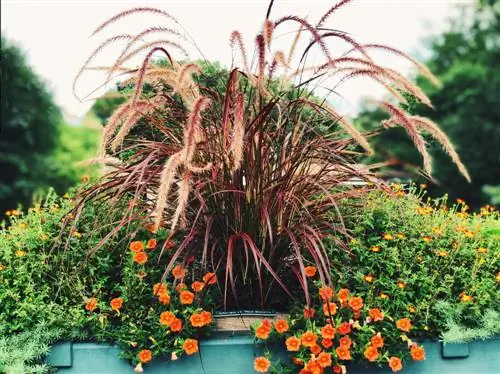
Left: Pennisetum “Hameln”, Right: Blue Fescue
Pampas grass is never suitable for the small hanging boxes that often dangle from balcony railings. Hanging boxes don't hold enough soil and wouldn't be able to support the weight. If you are looking for a natural privacy screen for the balcony box, blue fescue and pennisetum grass are preferable.
Blue Fescue: grows to approx. 30 cm high and 30 cm wide. The blue-green leaf color is striking. The bluebird is considered very easy to care for and is green even in winter.
Pennisetum: forms beautiful, feathery flowers. With growth heights between 30 and 150 cm, it can also grow quite tall. Pennisetum grass quickly grows into an eye-catcher in full sun and partial shade.
FAQ
Is pampas grass suitable for the apartment?
Pampas grass should not be in the apartment. There is a lack of important sunlight there and it is far too warm in winter. A large balcony is a good compromise.
Can you plant pampas grass in a balcony box?
A balcony box is not suitable for growing pampas grass. They are far too narrow and small. A suitable bucket holds at least 40 liters of soil.
Is pampas grass hardy in a pot?
Pampas grass in a pot is hardy as long as some measures have been taken. These are e.g. B. a suitable location, insulating the bucket and tying the stalks together.
Which soil is suitable for pampas grass in a pot?
Pampas grass prefers loose, nutrient-rich soil. Special ornamental grass soil from specialist retailers is recommended. But humic soil from the garden is also suitable.
How to plant pampas grass in a container?
Pampas grass also develops decorative flowers in the pot. However, the bucket should be able to hold a lot of soil. A water drain and a drainage layer are absolutely necessary, as waterlogging is not tolerated.

