- Author admin [email protected].
- Public 2023-12-16 16:46.
- Last modified 2025-01-23 11:21.
Buddleia (Buddleja) is so beautiful to look at during its flowering period that you can't have enough bushes of it. For example, the shrub looks particularly impressive when not used as a specimen plant. but plant in groups or as a hedge. But be careful: Buddleia has a strong tendency to self-sow, which is why you will soon own an entire forest without appropriate measures.
How can I propagate buddleia?
You can propagate buddleia (Buddleja) according to its variety by cutting cuttings and letting them root in a sowing soil and sand mixture or by planting them directly on the mother plant. Alternate buddleia (Buddleja alternifolia) can also be grown easily from self-collected seeds.
Propagate buddleia by sowing
The easiest way to propagate buddleia is probably because of its tendency to self-sow. Basically, all you have to do is wait and dig up the small, sprouting plants in good time and plant them in the desired location. Of course, you can also collect the ripe seeds yourself and sow them in pots. This makes it easier to avoid wild growth, and you can also select the he althiest plants straight away.
Surprises are inevitable with Buddleja davidii
However, with this form of propagation you should expect more or less big surprises, at least with Buddleja davidii - the buddleia also known as butterfly lilac. This is especially true if you have different flowering varieties of one species in your garden. Plants grown by self-sowing are not varietal, i.e. H. they only rarely resemble the mother plant. Instead, they often look similar to the wild form or form a cross between different varieties. With a bit of luck, you too will have a new variety of buddleia.
How to propagate Buddleja alternifolia from seeds
The situation is different with the alternate or Chinese buddleia (Buddleja alternifolia), which can be grown quite easily from seeds. And this is how you can successfully grow young plants from seeds you have collected yourself:
- Collect the ripe seed pods in autumn.
- You can recognize these by their brown-yellow color and the dried out shell.
- Sift out the seeds and put them in an airtight container.
- Store them in a dark, cool and dry place over the winter.
- Sow them in March / April in pots filled with seed soil.
- Keep the substrate moist and cover the pots with foil or similar.
- Prick the plants into individual pots in good time.
From around June you can finally put the young plants you have grown yourself directly outside, but you should first accustom them to the sun slowly.
Classic: Propagation by cuttings
For pure propagation, however, it is better to use classic cutting propagation. The best time to do this is in the summer months between June and July, although you can still have success with cuttings cut by mid/late August. And this is how it works:
- Do not choose too soft, flowerless shoots.
- If long enough, cut it into several pieces about 10 to 15 centimeters long.
- Shoots that are already woody are not suitable for propagation by cuttings.
- Leave two to three leaves per shoot.
- The rest is clipped off at the bottom.
- Cut the remaining leaves in half.
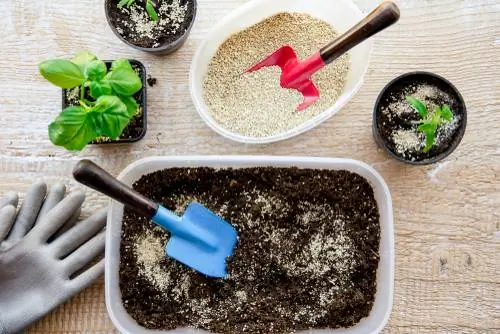
- Fill a mixture of 2 parts sowing soil (€6.00 on Amazon) and one part sand into small (clay) pots.
- Insert one cutting into each pot.
- Water them.
- Put a cut PET bottle over it as an improvised greenhouse.
- You can also stick long shish kebab skewers into the ground and put a plastic bag over them.
- Important: Both must be translucent.
- Aerate daily and keep the substrate moist.
The improvised mini greenhouse can be removed as soon as new shoots appear. Then roots formed and propagation was successful. The young plants should be kept cool for the first winter, but frost-free and bright. The following year you can plant them outdoors.
Use cuttings for cuttings
If any autumn pruning measures are due - for example, Buddleja alternifolia is thinned out in autumn - you do not need to throw away parts of the cuttings. Instead, some shoots can also be used for propagation. To do this, cut this year's woody shoots in late autumn, before the first frost. These should be around 20 to 25 centimeters long.
- Cut the bottom end at a slight angle, leaving the top straight.
- This way you can locate the correct ending later.
- Remove all leaves.
- You can put the pieces in straight away.
- To do this, prepare a suitable bed in a protected, partially shaded place.
- Dig it up thoroughly and enrich the soil with humus or compost.
- Put the pieces of wood into the ground so far that only a quarter is still sticking out.
- Keep them evenly moist.
- In severe frost, the cuttings are covered with fleece.
- If you can't put the cuttings in straight away, keep them in the fridge.
- To do this, wrap them in a kitchen towel.
- Then put it in the intended place in March / April as described.
Woods planted in autumn often develop the first tender shoots the following spring.
Tip
Another method is to propagate the buddleia using planters, which basically works like propagating cuttings. Just that the cuttings stay on the mother plant until they root.

