- Author admin [email protected].
- Public 2023-12-16 16:46.
- Last modified 2025-01-23 11:22.
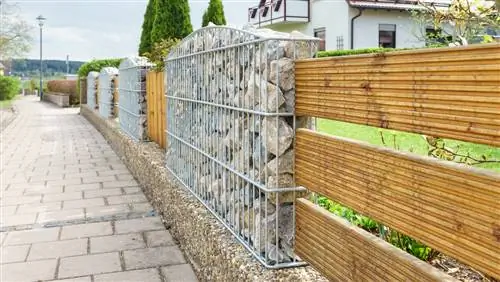
Wooden cladding instantly gives the aging stone or concrete wall a completely new look, which blends in extremely attractively with the natural surroundings. You can significantly influence the later effect by the type of wood, the width of the boards used and whether they are attached horizontally or vertically.
How can I cover a garden wall with wood?
To cover a garden wall with wood, you need support slats, boards (e.g. made of Douglas fir, oak or larch), stainless steel countersunk screws, dowels and tools such as cordless screwdrivers, drills, saws as well as drills and countersunk drills. Attach the slats to the masonry and mount the wooden boards on top.
Which types of wood are suitable?
| Type of wood | Advantages | Disadvantages |
|---|---|---|
| Douglas fir | Very weather-resistant, resistant to fungi, remains dimensionally stable in changing weather conditions. | The light wood darkens quickly. |
| Oak | Available in many color nuances and with attractive grain. Oak is water-repellent and extremely durable. The material is easy to process and has high elasticity. | Heavy and hard wood that darkens quickly. |
| Larch | Pleasant reddish color with interesting grain. Very durable, easy to process. Has natural resistance to rot and insect infestation. | This is often requested: The weathered larch wood changes color over time and develops a silvery-gray patina. |
| Tropical woods such as teak, bangkirai, ebony or bongossi | Pretty grain and coloring. Tropical woods are hard and extremely durable. | Expensive. In addition, the environmental impact of these materials is poor. Tropical woods are susceptible to fungal attack. |
Procedure
The basic principle of this beautification of an old wall is very simple: a slatted frame is screwed to the surface of the wall, which serves as a framework for the cladding made of boards.
Material list:
- Support slats in the appropriate length and width
- Boards
- Stainless steel countersunk screws
- Dowel
Tool list:
- Cordless screwdriver
- Drilling machine
- Saw
- Drills and countersink drills
If desired: impregnation agent or glaze and brush
Version:
- First clean the wall surface thoroughly. No dirt that could attract moisture should remain.
- Check the stability of the surface, for example by drilling a test hole. If material breaks off, the unstable surfaces are repaired with plaster.
- The load-bearing elements of the base battens are attached transversely to the course of the later cladding.
- Mark their position and drill a hole every 25 centimeters through the batten into the masonry.
- Insert dowels and screw the slats together.
- For good ventilation, we recommend counter battens so that a wooden grille is created. You can easily mount these on the existing strips.
- Additional screws that you insert at the intersection points ensure better stability.
- The cladding boards are now screwed from bottom to top or from one side to the other. Here too, a screw should be inserted every 25 centimeters.
Tip
If covering with wooden boards is too complicated for you, you can achieve a similar effect by attaching bamboo mats. However, this material weathers relatively quickly and has to be replaced after a few years.

