- Author admin [email protected].
- Public 2023-12-16 16:46.
- Last modified 2025-06-01 06:02.
The primary goal of a chili culture is the rich harvest of aromatic pods with a spicy kick. The way to get there is clear instructions, without any technical jargon. Here you will get to know the central aspects of plants and care in a practical way.
How do you successfully grow chili plants?
To successfully grow chili plants, sow the seeds in February or March in sowing substrate at 25-28 degrees, prefer a sunny, warm location with 6-8 hours of sunshine daily and plant at a distance of 50 cm. Regular watering and fortnightly fertilization promote growth.
Is every type of chili suitable for growing in the home garden?
Among the more than 30 species, 5 candidates have proven to be suitable for cultivation in the allotment garden, on the balcony and in the greenhouse:
- Capsicum annuum as the most popular type of chili
- Capsicum chinense with the hottest varieties, such as Habanero
- Capsicum frutescens, with the famous Tabasco variety
Capsicum baccatum and Capsicum pubescens still maintain the status of rarities. In terms of their demands, they are at least on a par with the three top dogs.
When should the advance start?
So that you can harvest in late summer or autumn, early sowing is important. Sow the seeds under glass in February or March. In sowing substrate at 25 to 28 degrees, germination occurs within 10 to 30 days.
The lower the temperature, the longer the cultivation takes. We therefore recommend a heated mini greenhouse that creates a warm, humid microclimate.
Which location do chili plants prefer?
As a tropical plant, chili is one of the typical sun worshipers. As soon as the cotyledons appear, the following location conditions are recommended:
- sunny location, warm and protected
- the temperature does not fall below 15 degrees
- at least 6-8 hours of sunshine daily
Flowers, leaves and pods should be protected from intense midday sun by shading. This premise applies to a location under glass as well as outdoors.
When should early chillies be repotted?
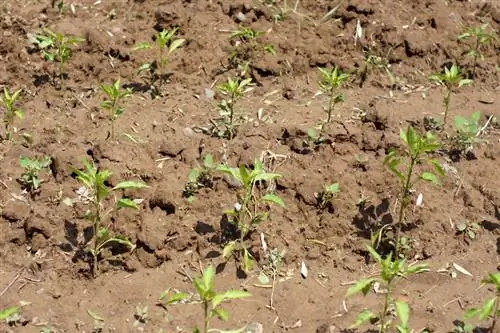
When they germinate, seeds initially produce 2 cotyledons. In the following weeks, several pairs of true leaves develop above this. At the same time, the young plants are moving ever closer together in the cultivation container. At the latest when the leaves touch each other permanently, they are repotted.
What should the substrate be like?
Commercial sowing and vegetable soil meets all the important requirements. Knowledgeable recreational gardeners prefer their own mixture as a substrate:
- Soil for sowing: 8 parts peat, 2 parts each perlite and vermiculite
- Pail substrate: 1 part each of garden soil and compost with 1 handful of sand or perlite as an addition
- Bedding soil: fresh, permeable, humus, nutrient-rich and slightly moist.
Plant chili in the bed at the right time
Chili plants that have been grown by hand or purchased ready-made can be placed on the balcony or in the bed from mid-May. Experience has shown that late frosts are no longer to be feared at this time. If you want to be on the safe side, wait until after the cold weather.
- dig a planting hole with twice the volume of the root ball
- A drainage made of gravel or crushed pottery shards is created at the sole
- Place chili in the middle, dig in with substrate and water well with rainwater
The central care factors consist of regular watering and fortnightly fertilization.
At what distance should chilies be planted?
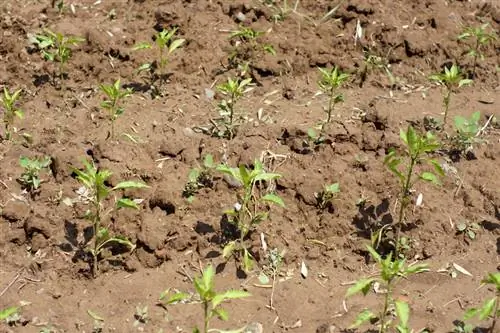
Depending on the variety, chili plants develop a more or less sprawling habit. With a planting distance of an average of 50 centimeters, you avoid the risk of tightness in the bed.
Which neighboring plants are suitable - which are not?
Chili harmonizes perfectly with herbs such as basil, thyme or lemon balm. All other nightshade plants, such as tomatoes, potatoes or eggplants, are less suitable as neighbors.
Can green chili be harvested?
Chili peppers do not ripen after harvest. Picking them when they are green is therefore not recommended. Ideally, you should wait a few days after the color change and then proceed to harvest.
Propagate through self-harvested seeds
The harvest simultaneously provides plenty of material for propagation in the form of seeds.
- cut the pod in half with a sharp knife
- Carefully remove the seeds with a teaspoon
- remove the pulp thoroughly
- Be sure to wear gloves and safety glasses when carrying out this work
Laid out on kitchen paper, the seeds dry quickly. For storage, we recommend dark screw-top jars with labels.
Tip
Chili plants grow better if the bed soil has been pre-warmed with black mulch film for a period of 14 days.

