- Author admin [email protected].
- Public 2023-12-16 16:46.
- Last modified 2025-06-01 06:02.
A herb spiral offers ideal living conditions for local wild herbs, Mediterranean and Asian noble herbs. This guide is dedicated to hobby gardeners who build and skillfully plant their own representative herb garden. Read here how a DIY construction can be done perfectly from scratch. This is how you properly create a herb spiral with a pond in the garden.
Material requirements and tools
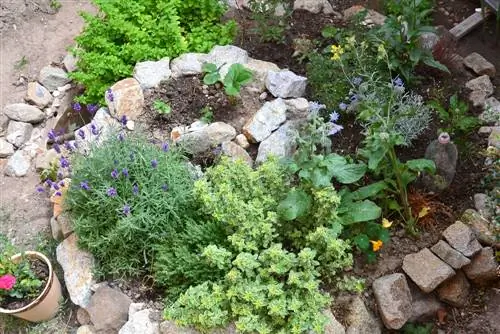
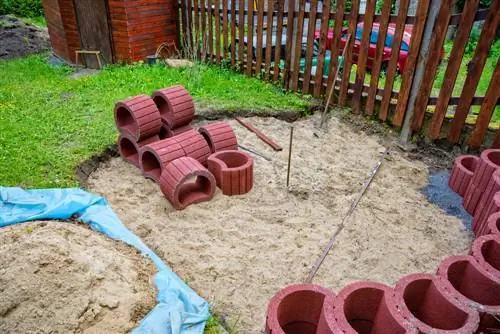
Traditionally, a dry stone wall made of natural stones gives a herb spiral external shape and weatherproof stability. Hobby gardeners rarely choose wood as a form-giving frame because it requires regular maintenance work. Concrete planting stones for home-made herb snails are becoming increasingly popular. The following list of requirements for materials and tools is aimed at DIY construction of a herb spiral with a pond made of stones:
- Stones (at least fist thick), ideally natural stones, either field stones, bricks or paving stones
- Sand, gravel and limestone gravel
- Garden, weed or filter fleece to cover the gravel filling
- Garden soil, compost soil, herb substrate
- Planting pockets for planting gaps in the outer wall area
- Pond tub (a mortar bucket is cheaper) or pond liner
- Herb plants (see planting plan below for more details)
- Wheelbarrow
- Hand shovel, spade, rake, rake, work gloves
- Folding rule, wooden pegs, string and lime for marking the base area
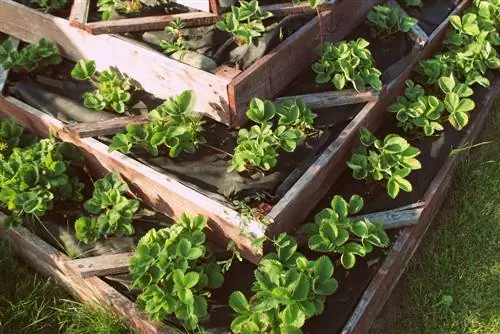
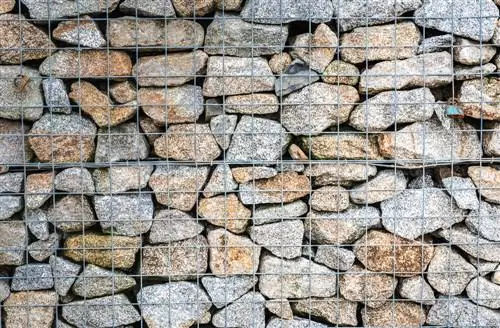
You can adapt this shopping list to individual alternatives with simple modifications. Replace the stones sub-item with wood, metal, gabions or plant rings. Taking into account the specific material characteristics, the conceptual structure with climate zones, pond, filling and planting is retained. Please keep in mind that if you use alternative materials, such as plastic, Corten steel, concrete palisades or wood, you will lose the additional growing space that a dry stone wall or planting stones on the outside have to offer.
Excursus
Building a herbal spiral
The herb spiral is a special variant of the raised bed. The expert construction integrates different climate zones to honor the respective character of the herbs. This means that local, Mediterranean and Far Eastern herbs can thrive in the smallest of spaces. The following climate zones have proven to work well in practice for the medium-sized herb snail in this construction manual: dry zone (top), temperate normal zone (middle area), wet zone (lower area), water zone (pond).
Preparing the base area - step-by-step instructions
A herbal spiral needs a lot of sun
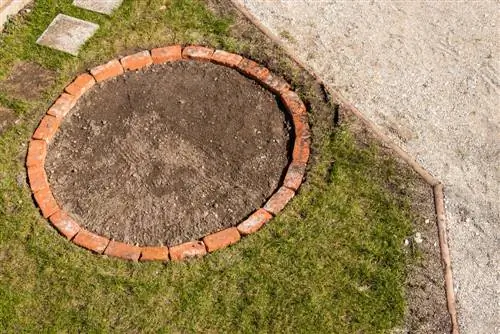
The self-made herb spiral deserves a sun-drenched front seat in the garden. Most premium herbs thrive as sun worshipers and have an aversion to windy locations. Plan a base area with a diameter of around 300 centimeters if you want to accommodate at least a dozen of your favorite herbs with a height of 80 centimeters. Position and orientation make an important contribution to a premium quality herb harvest. Please choose the location so that the herb snail opens to the south, regardless of whether the special raised bed is round or square in shape. This is how you prepare the base area in an exemplary manner:
Measuring and marking
- Determine the external dimensions with the ruler and mark them with wooden stakes
- Stick a longer wooden stick into the ground in the middle of the surface
- Attach the string to the wooden stick with knotted wooden sticks at the other end
- draw a circle using string and wooden sticks
- Within the circle, mark the turns for the snail shape with lime or light sand
Please mark the position for the pond where the herb snail opens with a southern orientation.
Prepare the floor
- Dig the base area one or two spades deep
- Rule of thumb: the higher the herb spiral, the deeper the excavation
- Fill garden soil to the side for further use as a filling component
- Distribute a layer of gravel 10 to 20 cm high as drainage and wall foundation
- Tamp down gravel (ideally compact with a vibrating plate)
- Dig the soil 40 cm deep for the pond
- create a layer of sand at the bottom of the pond as drainage and protection for the foil or pond tray
The best time for the preparation work and building a herb spiral is in spring, as soon as the ground has thawed. By the time the planting season for herbs begins in April/May, the soil in the bed has settled and is ready for young plants.
Construction instructions - step-by-step to the shell construction
The prepared base area also serves as a foundation for the drywall of a herb spiral. To ensure smooth construction work, all materials including tools should be ready to hand. The following construction instructions initially provide an overview of all the work steps, followed by more detailed explanations of the individual construction phases:
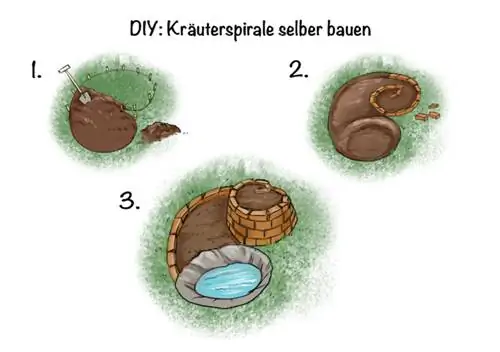
- lay the first row of walls on the gravel foundation (note markings)
- from the second row of walls onwards, stack the stones with staggered joints
- lay the following stone layers 30-50 cm shorter than the previous row of walls
- pile up gravel and gravel parallel to the construction of the wall
- Rule of thumb for an 80 cm high herb spiral: height of the gravel/gravel layer in the core is 50 cm
- optionally cover the gravel layer with breathable fleece (filter fleece)
- Create a pond at the foot of the dry stone wall
Explanations of the individual steps
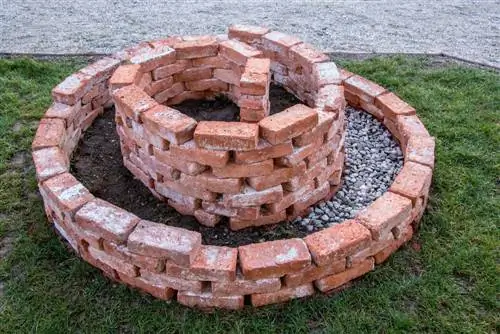
A herb spiral can be built from natural stones or bricks
For the first row of walls, choose the largest stones. Lay the stones close together, ideally slightly tilted and with a slight inward incline for best stability. The decisive factor for the stability of the drywall is the staggered, inclined laying of the following rows of walls. Cross joints must be avoided at all costs. Thanks to this construction method, you can avoid using mortar.
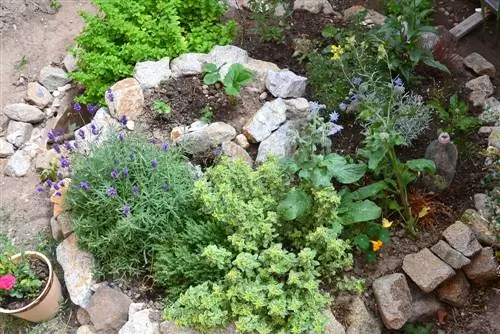
Despite the joint-staggered laying technique, small and larger gaps arise between the bricks. These cavities are ideal for growing additional herbs using plant bags. Cracks that are just one to two fingers wide provide sufficient living space for frugal herb plants. If you fill the gaps with herb substrate when layering, you can simply avoid using plant bags. One or two gaps in the masonry remain free and serve as a sought-after hiding place and retreat for beneficial insects in the garden.
The layer of gravel (either limestone or building rubble) grows parallel to the dry stone wall and reaches a thickness of a good 50 centimeters at the highest point. Towards the pond, the gravel layer gradually decreases, proportional to the decreasing wall height. We recommend a cover with filter fleece so that the substrate layer that follows later does not trickle down between the coarse gravel, then collapse heavily and, in the worst case, render the drainage useless.
Creating a pond - How to do it right
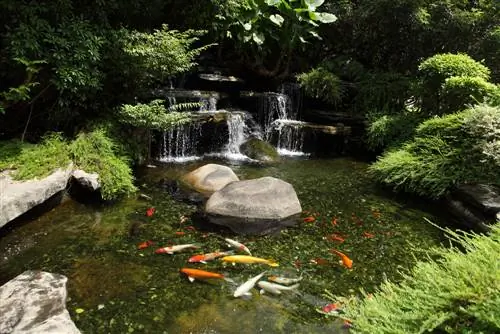
After completing the masonry work, focus on the small pond at the foot of your herb spiral. Place pond liner or use a pond tray in the 40 centimeter deep pit lined with sand. Use fist-sized stones to conceal the transition from the foil or tub to the adjacent bank area.

Fill the herb screw correctly
The correct climate zone of a herb spiral is made up of position and filling. In a dry zone with full sun, Mediterranean herbs only find ideal living conditions when they extend their roots into sandy, dry soil with good permeability. Local herbs only develop their unique aroma when they have humus-rich, fresh and nutrient-rich soil quality. The following overview sums up which earth determines the character of the respective climate zone:
- Dry zone: 50% sand, 50% garden soil
- Normal zone: 30% sand, 30% garden soil, 30% compost, 10% lava granules
- Wet zone: 50% garden soil, 50% compost
- Water zone: 100% compost or garden soil
If mixing the various components is too time-consuming, use commercially available herbal soil and sand. You adjust the amount of sand to the relevant climate zone within the herb spiral. In the dry zone, please start with herb substrate and sand in equal parts. The sand quota gradually decreases towards the wet zone.
Please keep a supply of all soil mixtures until the planting season begins. Substrate freshly piled onto the gravel layer will collapse by up to a third and should be filled up. Laying filter fleece slows down the process, but not completely. For this reason, a period of at least 2 weeks should elapse between building a herb spiral and planting.
Background
Kit - premium solution for beginners
The perfect structure of a herb spiral isn't something hobby gardeners can just shake out of their sleeves. Nervous stress and annoyance remain at the garden gate if you use a ready-made kit from a specialist retailer to build a herb snail. Thanks to this clever move, creative design options open up that will give you envious looks over the garden fence. In well-stocked hardware stores you can discover well-thought-out kits made of gabions, patina metal or plastic, from handy-small for balconies and kitchens to impressive ones for representative gardens.
Planting herb spirals - ideas for the planting plan
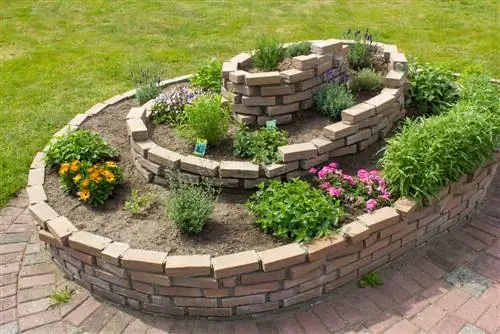
The plants that need the most sun should grow in the upper part
With a well-thought-out planting plan, your herb spiral serves as a valuable source of aromatic seasoning for preparing tasty dishes. Fresh parsley, crunchy chives and tart, spicy basil show the red card to artificial flavor enhancers. To ensure that your kitchen does not lack freshly harvested herbs for preparing local, Mediterranean and Asian dishes in the future, the following selection would like to inspire you for the perfect planting plan:
Herbs for dry to temperate conditions
| Dry Zone | botanical name | temperate zone | botanical name |
|---|---|---|---|
| Lavender-Thyme | Thymus thracicus | Basil | Ocimum basilicum |
| Rosemary | Rosmarinus officinalis | Coriander | Coriandrum sativum |
| Spice Sage | Salvia 'Berggarten' | Tarragon | Artemisia dracunculus |
| Oregano | Origanum vulgare | Chives | Allium schoenoprasum |
| Marjoram | Origanum majorana | Pimpinelle | Sanguisorba minor |
Also in good hands in the upper, sandy-dry regions of a herb spiral are mountain savory (Satureja montana), thyme (Thymus vulgaris) and curry herb (Helichrysum italicum). Immediately below, in the middle area, you can find: spicy fennel (Foeniculum vulgare), parsley (Petroselinum crispum), chives garlic (Allium tuberosum) and nasturtium (Tropaeolum majus).
Herbs with a penchant for moist soil
| Wet zone | botanical name | Water Zone | botanical name |
|---|---|---|---|
| Dill | Anethum graveolens | Bachbunge | Veronica beccabunga |
| Garden Mountain Mint | Calamintha grandiflora | Watercress | Nasturtium officinale |
| Wild garlic | Allium ursinum | Water Nut | Trapa natans |
| Sorrel | Rumex acetosa | Liquorice calamus | Acorus gramineus ‘Licorce’ |
| Nasturtium | Tropaeolum majus | Sedanina | Apium nodiflorum |
Chives, tarragon and parsley have no objection to living in the wet zone if there is already a lot of space in the middle sector. If you still have a spot available on the bank of your herb spiral, it should be reserved for water celery, also known as creeping celery (Apium repens) with a wonderful parsley aroma.
Tip
Dotted marigolds are useful in your herb spiral as natural pest police. The distinctive flowers ward off cunning nematodes, aphids and other uninvited guests from your valuable herbs. Last but not least, the colorful flower heads enrich a herb snail as a swarming bee pasture.
Growing, aggressive herbs stay outside
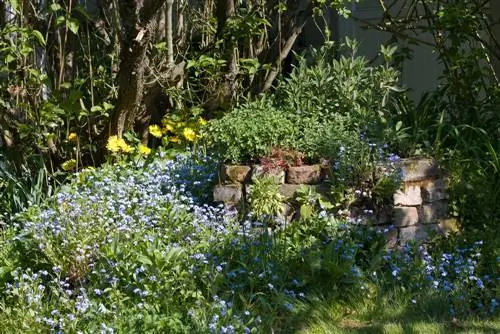
Heavily overgrown herbs do not belong in the herb spiral
Various herbs are unpopular because they tend to overgrow. Other species release inhibitors that affect the growth of their plant neighbors. Give the following herbs a ban and grow them outside of your herb spiral:
- lovage, maggi herb (Levisticum officinale)
- Comfrey (Symphytum)
- Wormwood (Artemisia absinthium)
- Spice laurel (Laurus nobilis)
- Hyssop, vinegar herb (Hyssopus officinalis)
If you don't want to miss out on the healing or seasoning power of these herbs, we recommend cultivating them in a large container.
Planting instructions - how to plant herbs correctly
Have you made your choice from the colorful array of aromatic herbs for the herb spiral? Then pay special attention to the following planting instructions. When temperatures rise in spring, the shelves of garden centers, hardware stores and weekly markets are full of pre-grown young plants. How to plant herbs with gardening expertise:
- place the potted root balls in water (ideally rainwater) until no more air bubbles appear
- Dig out spacious planting holes at the appropriate position of the herb spiral
- Unpot the plant and position it in the middle of the planting pit
- stabilize with one hand, fill substrate with the other hand
- maintain previous planting depth
- Press the soil with both hands to ensure a good seal on the ground
- pour with a fine spray
When measuring perfect distances, please remember that many herbs reach expansive dimensions. When purchasing, please inquire about the recommended planting distance for each individual herb plant. Crowding in the herb garden is the main cause of the explosive spread of diseases and pests.
Avoid common mistakes
Building a herb spiral with stones, a pond and proper plants is not a side project. In order for time and money to result in a rich harvest of delicious herbs, you should be aware of typical mistakes. The following overview names common mistakes surrounding the planting of herb snails, points out harmful symptoms and gives useful tips for prevention:
| Error | malicious image | Prevention |
|---|---|---|
| Herbal spiral improperly installed | Drystone wall collapse | lay large stones at the bottom, slight incline |
| no drainage filled | Waterlogging, dead herbs | Fill gravel/gravel as foundation and drainage |
| growing herbs planted | Shadows and growth depression | Planting lovage etc. outside |
| wrong orientation | Lack of light, low crop yield | Observe north-south orientation |
| Construction and planting at the same time | Herbs don't grow in sagging soil | 2 weeks waiting time between construction, filling and planting |
Frequently asked questions
What is a herbal spiral?
A herb spiral is a three-dimensional raised bed that simulates the different climate zones in a small space. Traditionally, a dry stone wall acts as a frame that winds up around a pile of stones to a back-friendly 80 centimeters. The stone filling serves as drainage up to a height of 50 centimeters, followed by soil as a plant substrate. A herbal spiral resembles a snail shell, so herbal snail is another common name. The dry, normal, wet and water zones merge seamlessly into one another and are planted with appropriate herb species.
When should you put on a herbal spiral?
There is no fixed time for building a herbal spiral. You can plan construction work almost all year round, as long as the ground is not deeply frozen. In practice, early spring has proven to work well, ideally a few weeks before the planting season begins. Furthermore, autumn is a wisely chosen date for building a herb snail. By next spring, microorganisms living in the compost portion of the filling will have prepared the soil to such an extent that freshly planted herbs can grow vitally and he althily.
Which herbs belong where in a herb spiral?
In the structure, a herbal spiral with a pond represents four elementary climate zones in mini format. Mediterranean herbs such as rosemary, oregano, thyme and sage reside on the sandy, dry spiral peak. In the middle region, temperate, humus-fresh conditions prevail, ideal for basil, fennel or parsley. This area transitions seamlessly into fresh, moist soil qualities where local herbs thrive, such as dill, sorrel or chives. The pond bank is reserved for herbs that love swampy conditions, such as cress or watercress. You can use the water surface of the pond as a growing area with water nuts.
When do you plant a herb spiral?
The time window for planting a herb snail opens in spring, when there is no longer any risk of severe frosts. As the climate warms, you can now note mid/late April instead of mid-May as the earliest planting date in your calendar. Primarily Mediterranean herbs are sensitive to frost and should not be exposed to temperatures below freezing. Immediately after building a herb spiral, we recommend waiting two weeks until planting so that the fresh soil can settle.
Where can you buy a herbal spiral cheaply?
The Obi hardware stores with numerous locations in Germany and Austria are the leaders in offering affordable herbal spirals. Here you don't just get sophisticated kits made of gabions, metal, Corten steel and wood. If you have a little manual skills, you will find all the materials and tools to build your own herb spiral with a pond. Do you prefer selecting and purchasing from the comfort of your sofa, including delivery to your door? Then you should take a look at Amazon.
Is there a herb spiral that is small enough for the balcony?
We looked around specialist retailers for you and discovered two recommended mini herbal spirals. From the Bellissa range, Obi offers a gabion kit with a space-saving height of 29 cm and a diameter of 57 cm. Filled with 20 liters of herbal soil, there is space for up to 10 of your favorite herbs. The Bellissa series also offers decorative herb snails made of terracotta, wood, metal and Corten steel in sizes suitable for balconies, which can be purchased on Amazon and Ebay.
How can I build a herb spiral with a stream myself?
The DIY construction of a herb spiral with a stream is one of the supreme disciplines for hobby gardeners. The ambitious goal requires various modifications to the construction instructions in this guide. The key function is the addition of a source within the spiral crown, which is fed by an electricity or solar-powered pump. In order to guide the flowing water stylishly to the lower pond, stream mats covered with gravel have proven to be excellent. It is important to ensure continuous access to the pump and source so that you can intervene when winter sets in to avoid frost damage.
I would like to build a wooden herb spiral in the garden. Which types of wood are suitable?
In the garden, a herb spiral is exposed to wind and weather all year round. Hardwoods are primarily prepared for this challenge. Robinia, oak, maple and sweet chestnut have a high wood density, which guarantees the best weather resistance. Slightly bevelling the wooden posts allows water to drain more quickly and prevents rot without having to impregnate the wood with glaze. Place each post in a metal shoe to protect against direct ground contact. One side of the shoe remains open so that no moisture can accumulate and penetrate the wood. Softwoods such as spruce or fir are not recommended as building materials for a herb spiral because they rot within a short time.
My budget is too tight to buy a kit or a finished herbal spiral. How can I build a herb snail myself for free?
To build a stone herb spiral for free, look for free field stones. In classified ads and forums, farmers, hobby gardeners and do-it-yourselfers offer leftover stones for people to collect themselves. Garden soil, gravel and sand can be obtained free of charge in new development areas and recycling centers if you have transport options. You can easily make compost soil yourself. Ask your hobby gardener friends for seeds so you can grow your herb favorites on the windowsill or sow them directly in the herb spiral.
Which herbs go best together in a herb spiral?
Over many years of cultivation practice, popular herbs have emerged as dream teams for the herb spiral. Water mint, watercress and calamus harmonize on the banks of the pond. Dill, parsley, chervil, garden cress and marjoram maintain good neighbors in moist and normal areas. In the dry zone, sage, oregano and thyme thrive peacefully side by side. In contrast, thyme and marjoram are at war and should be planted at an appropriate distance.
Tip
A square herb spiral gives your modern front garden design the finishing touch. Where clear lines and geometric shapes dominate, you can think outside the box when building a herb snail. This can be achieved perfectly with a kit made of gabions. Prefabricated herb spirals made of Corten steel or stainless steel are popular, which will quickly showcase your herbs with an authentic rust look.

