- Author admin [email protected].
- Public 2023-12-16 16:46.
- Last modified 2025-06-01 06:02.
If you create a compost correctly, you start an ingenious, natural process. Plain waste from the garden and kitchen is transformed into rich natural fertilizer. At the end you will have loose, wonderfully forest-smelling humus in your hands for nutritious garden soil and magnificent plants. This guide with lots of tips explains how you can set the course for this worthwhile goal. This is how you create your own compost in an exemplary manner in the garden and on the balcony.
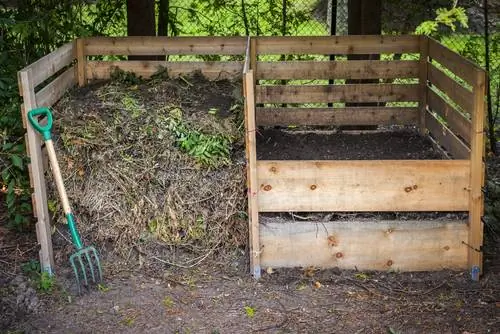
Choose location wisely
The ideal location for the compost site is partially shaded to shady and surrounded by air. There are perfect conditions under the canopy of mighty trees. In the damp, cool shade of the trees, organic waste does not dry out nearly as quickly as in full sun. Open ground is important as a substrate. This allows excess water to seep away and hard-working soil organisms get into it. For this reason, sealed surfaces are taboo.
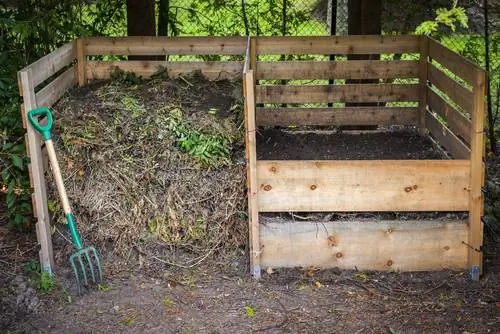
So that enough oxygen can reach the compost in an airy location, please make sure there are wide air slots in the side walls of the container.
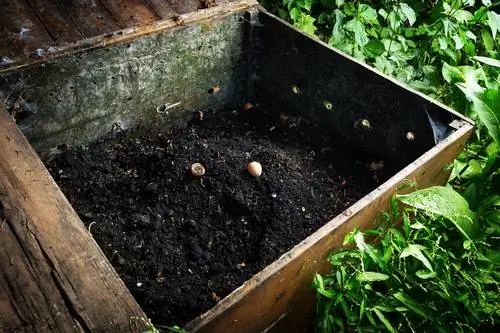
A compost heap must get enough air
When is the best time of year?
You can basically create new compost at any time, as long as it is not freezing or constantly raining. The best time of year to tackle the project is spring. Rising temperatures call into action the essential soil organisms that are responsible for the decomposition process. Furthermore, it is advantageous for the rotting process with temperatures of up to 70 degrees if the difference to the outside temperatures is as small as possible.

Creating new compost - step-by-step instructions
The classic compost starts with a container. Traditionally it is a simple silo made of wooden slats or wire mesh in which you can collect organic waste. It is advantageous to have the option to add a second or third container, which can later accommodate semi-ripe or mature compost. How to create new compost correctly:
- Lay out wire mesh at the selected location to protect against voles
- Set up compost bins
- as the first layer, spread 15 to 20 cm high of coarse material, for example a mix of wood and perennial cuttings
- as a second layer, pile up shredded kitchen and garden waste 15 to 20 cm high
- spread humus-rich garden soil or finished compost soil 5 to 10 cm high as a third layer
- water with rainwater when dry
- Fill the compost heap with mixed waste up to a maximum height of 120-150 cm
In the last step, equip each compost container with a lid. Straw or reed mats are good and cheap. You can optionally protect a compost heap with a breathable compost fleece against constant rain, snow and cold.
Compost is the gardener's bank account. You pay in organic waste and receive valuable natural fertilizer as a return.
Laying compost correctly - tips & tricks
A wide range of organic waste is suitable for composting. The more colorful the mixture, the higher quality the end product. You can skilfully exploit the different structures and textures of garden and kitchen waste by layering and mixing the materials correctly. The following examples illustrate the principle:
- Wet and dry: Lawn clippings and autumn leaves
- Dense and loose: Banana peels and cleaned-out, withered flowers
- Nitrogen-rich and nitrogen-poor items: coffee grounds, tea filters and shrub cuttings
Every now and then add a thin layer of good garden soil or finished compost soil to inoculate the compost pile with additional microorganisms. A handful of rock dust works wonders against unpleasant smells.
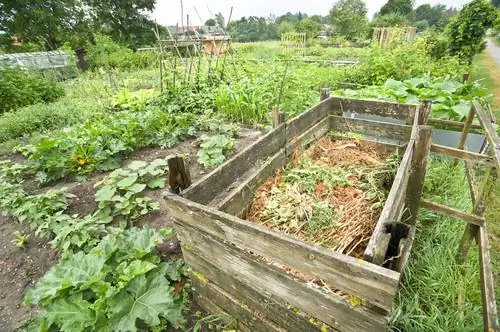
When it comes to compost, proper layering is important
Three-chamber principle is trump card
Compost experts advocate the three-chamber principle. All suitable waste is collected and mixed in the first container. The first rotting phase is taking place next door. In the third chamber, half-finished compost decomposes completely and becomes garden-friendly. If you have used the finished humus in the garden, transfer the contents of the second chamber there. The contents of the first container move into chamber number two, freeing up space for fresh waste.
When you create new compost, the three-chamber principle will give you your first premium quality compost after about nine months. Once this cycle is started, the waiting time is reduced to six to seven months in the following years. The most important premise is a maximum capacity of one cubic meter per chamber.
Excursus
Creating a new lawn with compost
Compost provides a valuable starting aid for noble grasses when you create a new lawn. Sown lawn seeds turn into a dense, velvety green area if they are given a fertile soil cover of 15 to 20 centimeters. For this purpose, work mature, sifted compost into the topsoil. The addition of quartz sand guarantees good permeability and prevents waterlogging. Before sowing, work the nutritious subsoil with a rake and rake until a fine, crumbly seedbed is formed.
Special shapes quick composter and thermal composter
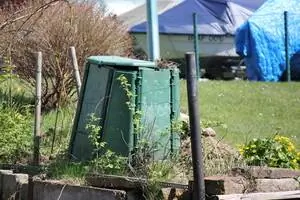
Low waste in the garden and kitchen brings two special forms of composting into focus. If only a small amount of compost is to be cultivated, investing in a quick composter becomes interesting. Specialist retailers offer these small compost silos in the form of closed containers with lids. Microorganisms and compost worms gain access through holes and slits in the soil. An open floor as a substrate, a good mix of different materials and regular ventilation are important for smooth rotting.
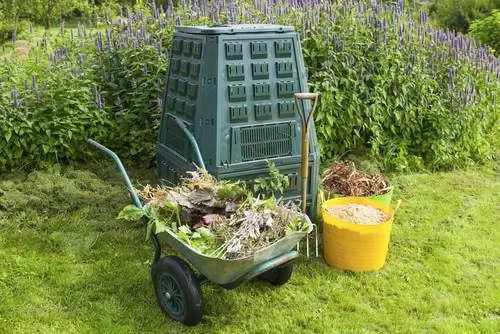
A quick composter must be placed directly on the ground
Thermal composters emerged from the quick composter. The inside of the containers is also lined with heat-insulating material to maintain temperatures at the ideal level for rotting organisms. A thermal composter stimulates self-heating even if the material volume is actually not enough.
If you want to create compost in the garden with children, rapid and thermal composters are perfect. The barrel is filled in one go, poured over with nettle broth and sprinkled with stone powder. Regular turning with the hand crank ensures that the materials are mixed and the air is supplied. Live and within a short period of time, children experience the basics of a functioning, natural cycle, in the spirit of permaculture.
Tip
Quick composters inexorably transform into a heavyweight the more organic material accumulates in them. The containers are well positioned on a stable surface made of grass paving stones. Waterlogging cannot form and the bin will not sink into the ground if continuous rain softens the ground.
What goes in the compost - what doesn’t?
If you create your own compost, organic waste from the kitchen and garden is transformed into nutrient-rich humus. Of course, the goal becomes far more distant if you dispose of rubbish indiscriminately in the compost heap. Some substances should always be disposed of with household waste. The following table shows what goes into the compost and what doesn't:
| good | bad |
|---|---|
| Vegetable leftovers (uncooked) | cooked food leftovers |
| Pruning | spoiled fruits and vegetables |
| wood cuttings | Baked goods of all kinds |
| Coffee grounds, eggshells | Meat and fish leftovers |
| Tea and coffee filters | Weeds |
| Small animal litter | Dog and cat feces |
| kitchen paper | fresh horse manure |
| Tempo handkerchiefs | Glossy magazines |
| withered flowers | Metal, ceramic, leather, glass |
| Lawn cutting | Vacuum cleaner bags |
| Fruit bowls | sick plants |
Composting wood and wood ash is a double-edged sword. Only use both materials for compost if you are sure that there are no toxic residues such as heavy metals, pesticides or chemical glazes. Against this background, peels from exotic citrus fruits are also better off with household waste because they have been treated with fungi-inhibiting chemicals for the long transport routes. If poisons and chemicals sneak in via this back door, there can no longer be any question of organic compost.
Special case of horse manure
Horse manure is traditionally one of the most valuable natural fertilizers. Of course, horse manure only has its much-vaunted fertilizer value after a decomposition process that takes months. Fresh horse manure is therefore just as unsuitable for composting as dog or cat waste. Rather, a separate compost area must be created for horse manure where the rotting takes place. Regular mixing ensures the necessary oxygen supply. Furthermore, the rotting manure must not dry out. Layering up different materials, like garden compost, is not necessary. After four to six months, horse manure has been transformed into valuable fertilizer.
Composting autumn leaves properly - tips & tricks
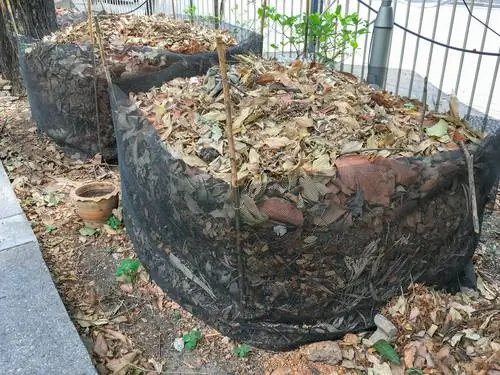
Autumn leaves must be combined with wet waste
High volume of leaves in autumn often causes headaches for beginners to composting. Disposing of large amounts of autumn leaves on the compost heap torpedoes the basic rule of he althy mixing. How to manage your compost site expertly in the fall:
- Throw autumn leaves onto the compost in layers of 10 to 20 cm each
- sprinkle dried grass clippings or scarified moss as an intermediate layer
- Spread horn meal thinly as an additional source of nitrogen
- sprinkle stone powder or bentonite to prevent unpleasant smells
If you create a new compost in autumn with large amounts of leaves, spread some humus-rich garden soil or mature garden compost between the layers. If walnut, oak, birch or chestnut leaves dominate, shred the leaves in advance and mix them with dried lawn clippings, stone dust or horn shavings. The reason for the intermediate step is a high proportion of tannic acid in the foliage of these tree species, which significantly slows down the rotting process. These concerns do not apply to the leaves of fruit trees, maple, ash, hornbeam or linden.
Tip
In the natural garden, not all autumn leaves go into the compost. When piled up in a quiet, shady niche, the leaves act as a retreat and winter quarters for hedgehogs. Clippings, such as branches and twigs, serve as a base to create a small cavity. Layer autumn leaves on top. Pine fronds prevent the dry leaves from blowing away.
Creating compost on the balcony - is that possible?
Balcony gardeners don't have to go without beneficial compost for ornamental and vegetable plants. A worm fern serves as a replacement for the compost area in the garden. This is a wooden box with several chambers. Kitchen and plant waste is collected and inoculated with compost worms, which take care of the decomposition. It works that simply:
- 1. Chamber: organic waste accumulates, is eaten and processed by compost worms
- 2. Chamber: central habitat and breeding place for compost worms
- 3. Chamber: ready-made worm compost for all balcony and house plants
Then there is a collection container for rich worm tea in the lowest area. You can use the drain tap to tap off the natural liquid fertilizer to pamper your plants. A worm farm is the ideal option if you want to create a compost in the city and without a garden with children.
Ingenious functional principle - simply explained
Mother Nature provides the template for a natural fertilizer that you can produce yourself with little effort. Compost is rightly revered as gardener’s black gold. The better hobby gardeners are familiar with the natural context, the more successfully they can create their own compost. The most important framework conditions surrounding the functional principle of compost are summarized briefly and succinctly in the following overview:
- Definition: targeted nutrient cycle using organic material, air and soil organisms
- Starting phase: 1.-8. Week self-heating to 35-70° inside by active fungi and bacteria
- Build-up phase: 8th-12th week gradual cooling, influx of woodlice, ground beetles, compost worms, mites
- Maturity phase: from the 12th week onwards, immigration of earthworms and grubs, gradual conversion to humus
- Confectioning: Fine preparation of finished compost soil by sieving
As the compost heap goes through the various phases, optimized oxygen supply plays a key role. To do this, mix the material or move the pile. In this way it is guaranteed that busy creatures do not run out of breath while working.
5 common mistakes
When gardeners create their own compost for the first time, a lack of experience can lead to various mistakes. To protect you from annoying misjudgments, the following table lists five common naming mistakes with tips for prevention:
| Error | Prevention tips |
|---|---|
| sunny location | Create a compost site in a semi-shady to shady location |
| cooked food leftovers composted | Use only uncooked, organic waste |
| Materials not mixed | mix dry with wet, herbaceous with woody ingredients |
| Weeds thrown on the compost heap | Dispose of greedweed, dandelions etc. in household waste |
| never watered | water when dry |
Frequently asked questions
Creating a vegetable patch with compost - how does it work?
If you create a new vegetable bed, compost makes a significant contribution to creating nutrient-rich soil for he althy and vital growth. In this case the motto is: Don't spill, but make a mess. Distribute 15 to 20 liters of mature, sifted compost per square meter of soil area. Work the organic material in superficially with the rake. Allow the soil to rest for ten to fourteen days before sowing or planting the first crop of vegetables.
Our compost doesn't rot - what to do?
Various causes can slow down the rotting process or bring it to a complete standstill. An effective method for speeding up decomposition is to increase the worm population. You can purchase live compost worms from specialist retailers and release them. It is also helpful to spread a compost accelerator (€37.00 on Amazon) in powder form. It contains valuable bacteria and fungi that promote the fermentation process. Oscorna compost accelerator, Radivit compost accelerator from Neudorff or organic compost accelerator from Dehner achieve good results. The OBI compost accelerator is inexpensive and just as effective.
Creating Terra Preta compost - how does it work?
If you create a compost according to the Terra Preta concept, you essentially follow the guidelines for a traditional garden compost. Additionally, add biochar or activated carbon to the organic waste. This additive primarily functions as a compost accelerator. Furthermore, the special coal promotes ventilation and oxygen supply, which additionally vitalizes soil organisms. Last but not least, the powder binds many nutrients and prevents premature washing out by rain. Sprinkle a handful of activated or biochar over each layer. You can buy these from specialist retailers or make them yourself.
Tip
Every handful of ripe compost pulsates with life. They hold more creatures in their hands than there are people on earth. In the initial phase there are invisible fungi and bacteria. Immigrant woodlice, ground beetles and red dung worms can be seen with the naked eye. Finally, fat cockchafer grubs, useful rose beetle grubs and hard-working earthworms arrive.

