- Author admin [email protected].
- Public 2023-12-16 16:46.
- Last modified 2025-06-01 06:02.
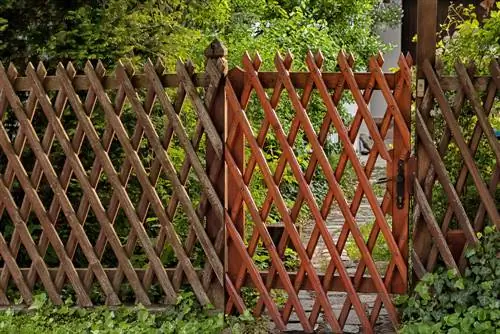
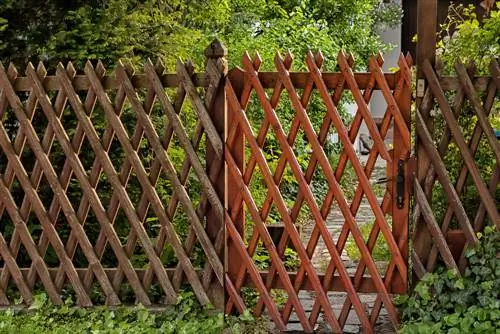
The fence is only perfect with a garden gate. This applies equally to brick, planted and timbered enclosures. Don't you want to make the compromises that come with ready-made doors? Then simply build your garden gate yourself. These instructions explain how to do it using the example of a wooden gate.
How do I build a wooden garden gate myself?
To build a wooden garden gate yourself, you need suitable wood, such as Douglas fir or pine, as well as materials such as wooden slats, strips, beams, drive-in sleeves, gate hinges and a gate trap. Build the frame, insert the gate posts, decorate the gate with decorations and then waterproof it with a wood stain.
Which wood is suitable?
Local woods are prepared for the Central European climate and can be purchased inexpensively. Therefore, choose one of the following types of wood to build your garden gate from:
- Douglas fir: naturally resistant and durable
- Larch: one of the hardest and most valuable native softwoods
- Pinewood: medium-heavy softwood with first-class properties for processing
Saving hunters choose pressure-treated spruce wood. Thanks to pre-treatment, the weather resistance of spruce wood is strengthened, making it suitable for building wooden gates and fences at an affordable price. The same applies to ash. If the wood is subjected to heat treatment, it counts as thermal ash in durability class 1 and is still inexpensive.
Material and tool list
The following materials and tools should be at hand so that you can assemble your garden gate without annoying interruptions:
- 1 wooden slat (150x10x5cm) for diagonal bracing
- 2 wooden slats (140x10x5cm) for the frame
- 2 wooden slats (100x10x5cm) for the frame
- 2 strips (120x8x3cm) for decoration
- 2 strips (115x8x3cm) ditto
- 2 strips (110x8x3cm) ditto
- 2 strips (117, 5x8x3cm) ditto
- 2 strips (112, 5x8x3cm) ditto
- 2 beams (120x12x12cm) as goal posts
- 2 impact sleeves for the goal posts
- 2 gate hinges for fixation
- 1 Gate trap as a door opener
- Stainless steel screws, nuts, bolts
- Wood glue
- Wood stain and brush
Tools required: spirit level, screwdriver, hammer, carpenter's pencil, meter rule and saw. If you invest a little more when purchasing the cut strips for the decoration, you will receive attractive profile heads in a semicircular, pointed or wavy shape.
Build your own frame - this is how it works
Build the frame for the garden gate from the 10 x 5 cm thick slats. To do this, cut out the two 140 cm and 100 cm long pieces of wood 2.5 cm deep and 10 cm wide at the ends. After you have applied the wood glue to the cut surfaces, put the pieces of wood together so that the format of 10 x 5 cm is restored at the corners.
Diagonal bracing now ensures stability. The 150 cm long wood fulfills this task. Cut the ends of the batten so that it can be pressed flush into the frame. Two stainless steel screws on each side fix the cross frame. Now mount the gate hinges and the door latch on the back and fasten them with continuous bolts. Nuts secure the bolts on the front of the wooden gate.
Setting the goal posts correctly - this is what you should pay attention to
So that the garden gate does not have direct contact with the ground, it will later be hung between the two goal posts. The distance to the ground should be such that no moisture gets to the wood. At the same time, small animals should not be able to gain access to the garden under the gate. How to install the posts correctly:
- Align the impact sleeves with the spirit level and hammer them into the ground
- Position the two 12 cm thick wooden beams on top and sharpen them
- Fasten using the bolts and nuts
- Attach the prefabricated wooden gate to the post
- Mark the places where the counterparts of the door latch and gate hinges are to be fixed
After you have screwed on the gate hinges and the door latch, you can hang up the self-made garden gate. Please check beforehand whether all right angles are maintained so that the gate does not hang crooked later.
Beautify and finish the garden gate - tips for decorating
After the duty, now comes the freestyle in the do-it-yourself construction of your garden gate. To give the gate an attractive appearance, the 8 cm wide and 3 cm thick strips are used. You can let your ideas run wild when it comes to arranging the decorative strips. You can optionally mount the boards in a row as strips of equal length. A beautiful look is created if you attach the wood in a length that increases from the outside towards the middle.
It is important to note that there is a distance of less than 5 cm between the individual decorative strips. Otherwise, uninvited guests such as martens and other small animals will not be deterred from visiting your property through the garden gate.
In the last step, impregnate your new garden gate with wood stain. We recommend using a glaze with the 'Blue Angel' environmental label, which guarantees a low content of ingredients that are harmful to he alth and the environment.
Tip
If you design your garden according to the principles of Feng Shui, the garden gate becomes more important. To ensure that the energy flows cannot leave the garden unchecked, a particularly massive gate serves as a symbolic barrier. By equipping a wooden gate with columns made of stones or gabions on the right and left, this premise is also fulfilled.

