- Author admin [email protected].
- Public 2023-12-16 16:46.
- Last modified 2025-01-23 11:22.
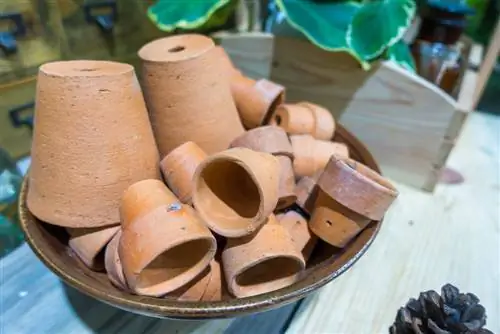
Flower pots are usually used for cultivating flowers, perennials, etc. However, clever minds have come up with something very special: using flower pots as small heaters.
How does a flower pot heater work?
A flower pot heater works by lighting several tea lights under terracotta or clay pots. The waste heat from the candles warms the sound, which releases the resulting radiant heat into the room and thus creates a cozy atmosphere.
Why a flower pot heater?
When the days get a little cooler and you still want to sit in the garden house, a flower pot heater can give off a little cozy warmth. When you sit together with friends, the small heater brings a certain level of coziness. Its heating power is not great, but it still creates a homely atmosphere.
Several of these mini heaters can ensure that the temperature in the greenhouse does not fall below zero degrees. This makes it possible to overwinter frost-sensitive plants safely.
How does the tealight heater work?
Several tea lights are lit and covered with terracotta or clay pots. The waste heat from the candles stays inside the pots and warms the clay. The radiant heat is released into the room. Depending on the size of the room, it takes a different amount of time before an increase in temperature can even be measured. However, if the oven is on the table and you sit around it, you can quickly feel the radiant heat.
Step-by-step instructions for building a tea light oven
Before starting work, tools and materials should be prepared.
The materials required
- a pot trivet made of clay/terracotta with a rim
- a small clay pot with a drainage hole, approx. 16 cm
- a large clay pot with a drainage hole, approx. 20 cm
- 6 nuts
- small and large washers
- 1 threaded rod approx. 30 cm long
- a spacer (metal tube, slightly larger in diameter than the threaded rod) of approx. 5 cm
- several tea lights
- Drilling machine with stone drill bits of various strengths
The instructions
First, all the required materials are laid out on a clean and solid worktop. Then we can get started.
- Drill a hole in the coaster. The threaded rod will be inserted here later.
- So that the machine does not run away while drilling, the center of the coaster should first be marked and, if necessary, carefully pre-drilled with a small drill.
- If the threaded rod is not available in a length of 30 cm, a longer rod must now be sawn to length with a metal saw.
- Now insert the threaded rod into the hole in the coaster and secure it on both sides with a washer and nut to prevent it from slipping. Be careful, the clay can break quickly.
- Now the small pot is attached to the pole. To do this, first screw a nut onto the threaded rod; the distance to the saucer must be so far that the pot and saucer are separated from each other by a large gap.
- Place a washer on the nut.
- Push the small pot onto the threaded rod with the opening facing down, secure at the top with a washer and nut.
- Place the spacer.
- Screw on the nut, place the washer over it.
- Put the large flower pot over the small pot. The spacer creates a cavity between the two.
- Secure pot with washer and final cap nut.
- Now the tea lights can be placed on the coaster and lit.

