- Author admin [email protected].
- Public 2023-12-16 16:46.
- Last modified 2025-01-23 11:22.
In recent years, the building materials industry has developed special adhesives that can be used to connect bricks with almost no visible joints. Thanks to modern construction methods, even laypeople can build durable and solid garden walls. The foundation, which is additionally sealed with a vapor barrier, also forms the basis for these.
How do I glue a garden wall?
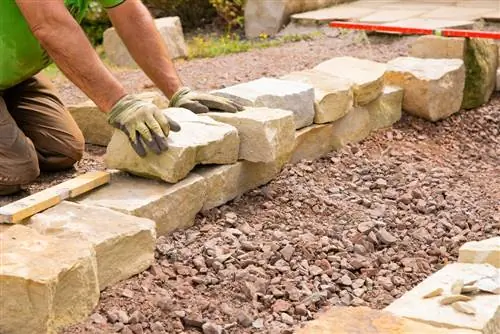
To glue a garden wall, you need special glue, bricks and a solid foundation. The first row of stones is placed in a bed of mortar, then the other stones are connected with the adhesive and the end stones are glued to the top of the wall.
Build foundation
- First mark the course of the wall with sticks and tension it with a guide line.
- Remove the sod and dig a trench 80 centimeters deep the width of the wall.
- Use formwork made of boards for sandy soils.
- Compact the substrate carefully with a tamping foot.
- Put about 40 centimeters of gravel into the pit in layers and compress it again and again.
- Mix the concrete until it is moist and fill the pit.
- Compact the foundation of the garden wall with the tamping foot and smooth it out with a squared timber using a large spirit level.
Be sure to adhere to the setting time of the material, which is usually 48 hours. The formwork is then removed. Finally, a layer of bitumen cardboard is flamed on as an additional moisture barrier.
The Walling
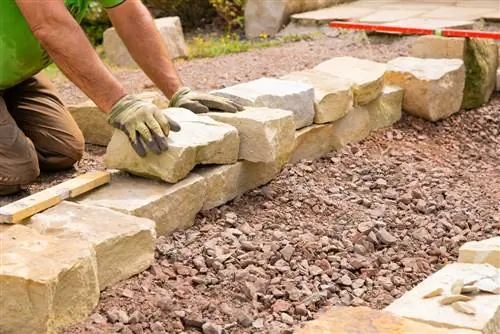
The first row of stones must also be placed in a bed of mortar on a glued wall. To do this, mix enough mortar, apply a layer about three centimeters thick and place the stones.
Tap these into place with a rubber mallet. The bricks must be at the same height and aligned. The material should then set for 24 hours.
Continue as follows:
- Apply the special adhesive according to the manufacturer's instructions.
- Put some glue on the stone, place the layers of glue on top of each other and press the brick lightly.
- Stagger the individual rows of stones by ¾ or half. A guide line is stretched for precise alignment.
Finally, the finishing stones are glued to the top of the wall. The gaps between the cover plates must be grouted so that no moisture penetrates here either.
Tip
Depending on the federal state, there are different regulations regarding how high a free-standing garden wall can be. You can obtain information about this from the responsible authority. The regulations are often also available online in the municipality's development plan.

