- Author admin leonars@hobbygardeners.com.
- Public 2023-12-16 16:46.
- Last modified 2025-01-23 11:22.
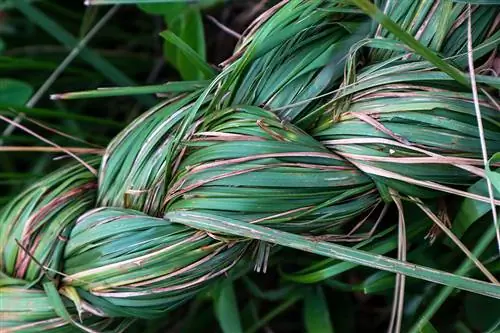
The resulting winter protection - to protect the heart of the plant from cold and wet - and the associated aesthetics make weaving pampas grass the new garden trend. Tying sweet grass together is nothing new, as weaving it with natural materials is one of humanity's oldest craft techniques.
How do you braid pampas grass for winter protection?
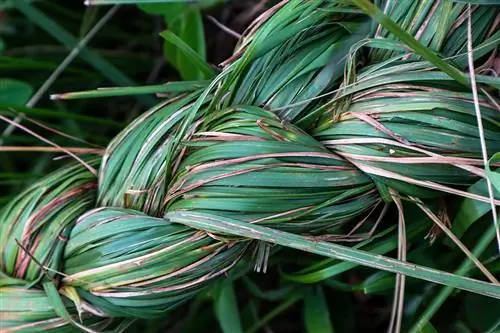
To braid pampas grass, divide a handful of stalks into three strands and braid them together like a French braid, adding new stalks as you go. The end of the braid is secured with a thread and hidden in the perennial.
How do you braid pampas grass?
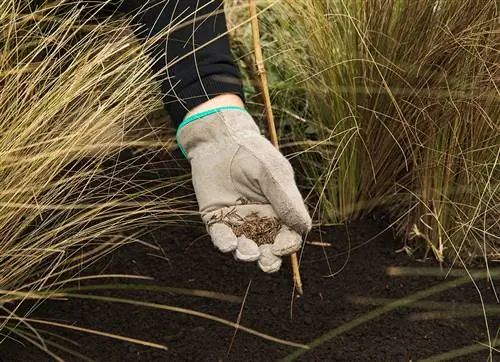
Tying works best with two people. One person holds the pampas grass together, the other weaves it. Put on thick gloves (€17.00 on Amazon) as the grasses have sharp edges. Starting from the bottom, take three handfuls of stalks and braid them diagonally upwards. As with the French braid, a new portion of grass is always added. The end can be pulled together with a safety thread and threaded into the upper part.
Weaving pampas grass: This is how it works
To make it easier for you to get started with your first homemade pampas grass, all steps are explained individually and in detail. Before starting work, it is advisable to put on long clothing and gloves as the leaves have very sharp edges.
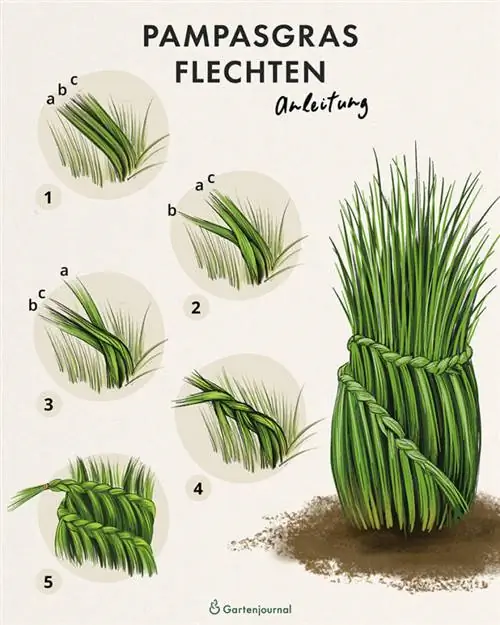
How to do it:
- Step 1: First grab a large handful of stalks and divide them into three equal areas (shown with a, b and c).
- Step 2: The middle strand is now placed to the left, while the previously left stalks move to the middle.
- Step 3: Now follow the right stems, which in turn are crossed with the middle braid. Every single strand has already changed its original position once.
- Step 4: Steps 1 to 3 are now repeated continuously, with new stalks being continuously incorporated into the braid.
- Step 5: Finally, the end of the braid is tied together with a thread to prevent the braided strand from unraveling. The end can then be hidden in the perennial, ideally at the back.
In addition, you will find an explanation video here that explains the individual steps again.

The instructions given can be carried out with almostany typeof Cortaderia selloana. However, with particularly small speciesthe braiding fails to serve its purpose because there are not enough stalks. Particularly tall-growing varieties are compiled in the linked table.
The optim altimeto start weaving islate autumn In any case, the flower fronds should already be fully formed. The timing can therefore vary slightly from variety to variety, although you should always have the work completed before the first frost.
Inspiration
Weaving materials was used to make baskets in the early years of humanity. The various methods are still used today, but no longer exclusively for vessels. In many places, braiding is used to enhance the appearance of plants.
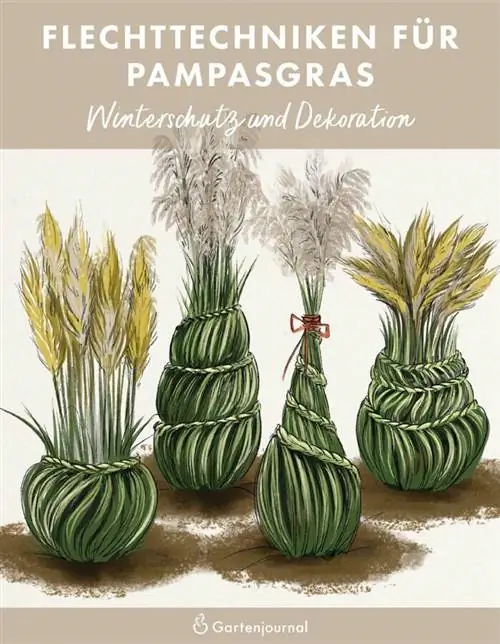
- In the example shown, only the outer stalks are braided in a circle around the perennial. The particularly high stalks with the impressive flower fronds remain in the middle. If necessary, some outer stems may need to be freed from their fronds or shortened. You can find some essential tips for pruning Cortaderia selloana here.
- This is the most famous and simplest braiding variant. The braid is braided as described above. If you have a privacy screen made of pampas grass, this option is recommended. The fronds remain open, the end of the braid is tied together and stuck between the grass at the top.
- The braid differs in that the inflorescences are tied together at the top with a ribbon. This variant deviates from the natural character by incorporating the ribbon and, depending on the ribbon color, appears more decorative. If you use jute ribbon you can maintain the natural character of the second variant.
- This form of weaving is very reminiscent of the first, but is characterized by much larger meshes. This variant is therefore particularly suitable for large-volume and pompous species. The stalks are basically braided in a circle around the plant in the same way. The longest stems remain in the middle, which appear even more voluminous thanks to the lower area being tied together. To further support the appearance, it is recommended to grow suitable plant partners that grow low to medium height. Combination options are explained in more detail in this article.
Weaving pampas grass as winter protection
In order to survive the winter and the frosty temperatures safely, there are a few things you need to do before the first frost hits. Whether you just tie the pampas grass together or braid it - the plant is grateful for any kind of winter protection.
Pampas grass in the bed
Even if Cortaderia selloana is generally a winter-hardy plant, some important information about preserving the ornamental grass and overwintering should be observed. We have put together an overview of all the important facts for you in this article.
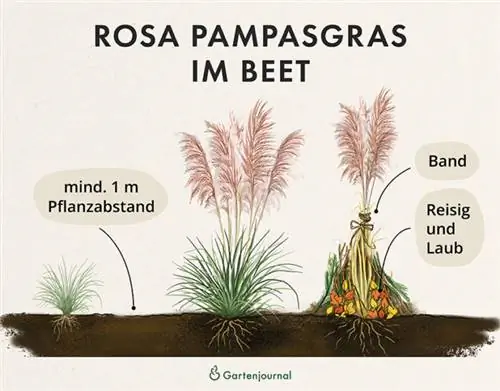
The flower fronds that have grown impressively over the fall should only be cut back in exceptional cases, as they protect the sensitive heart of the plant from the penetration of cold and moisture. To do this, it is recommended to either braid the fronds as described above or tie them together with a ribbon. To do this, brushwood and leaves should be spread in the lower area, which also have a protective effect.
If you plan to produce dried flowers from your fresh flower spikes, cutting back the stalks in autumn is permitted. In order not to cause lasting damage to the pampas grass, you should keep the selection as small as possible and cut the stems back to a maximum height of 20 centimeters. For more tips and step-by-step instructions, check out this article.
Pampas grass in a bucket
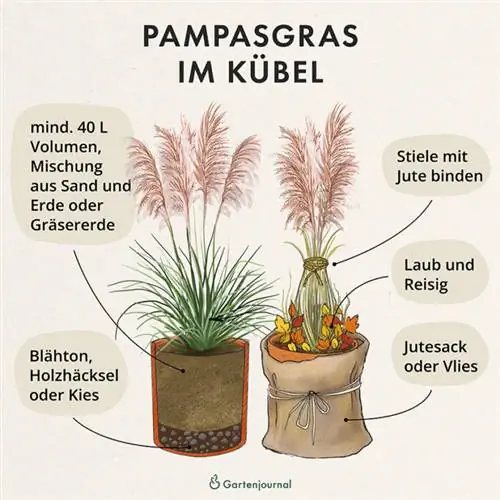
Specimens transplanted in pots need significantly more intensive protection than those grown outdoors. Due to the limited volume of the pot, the moisture it contains freezes noticeably faster, which can cause irreparable damage to the roots. In addition to the plant itself, the planter also needs suitable frost protection. Jute and bamboo mats are suitable for covering the bucket. We recommend wood and polystyrene sheets as a base, because the bucket should never stand on cold stone.
The above-ground part of the plant must be tied or braided as described above and covered with a layer of leaves. As a rule, small varieties such as Tiny Pampa or Evita are preferred for planting in containers. The special features of these genres and a buying guide are linked here. It is also advisable to move the pot to a sheltered location that is protected from the effects of the weather. What else you should pay attention to when caring for pampas grass in a pot can be found here.
FAQ
Why is pampas grass braided?
Braiding the stalks is primarily a visual beautification of the dry stalks. In addition, it also serves to protect the sensitive plant heart inside, which should be protected from both cold and moisture.
How is pampas grass overwintered?
Despite its winter hardiness, pampas grass requires additional winter protection. Specimens that are transplanted into a bed should also be surrounded with a layer of leaves and brushwood. Plants transplanted in pots require much more intensive protection, which also includes the planter. This should be secured with jute, Styrofoam, wood or bamboo.
What plants can you braid in winter?
Basically, the stems of all plants that do not dry out completely and wither over the winter can be braided. Almost all ornamental grasses such as reeds, grasses and bamboo are suitable for this.
How is pampas grass braided?
Several methods are known for braiding pampas grass. These are usually based on the regular braiding variants for hairstyles. The most famous, however, is the following one, in which three strands are interwoven alternately. This ensures high stability of the braid and at the same time the desired protection.
When is pampas grass tied up?
You should tie your pampas grass together in the fall before the first frost. The cold causes the stalks to lose their stability, which leads to easier penetration into the inside of the plant.

