- Author admin leonars@hobbygardeners.com.
- Public 2023-12-16 16:46.
- Last modified 2025-06-01 06:02.
It's been raining heavily outside for days, the children are on summer vacation and are bored, and in general being locked in the house doesn't work for the whole family. A campfire with stick bread and sausages would really lift the mood - it's just a good thing that the fire pit was built with a roof! So nothing stands in the way of romantic pleasure.
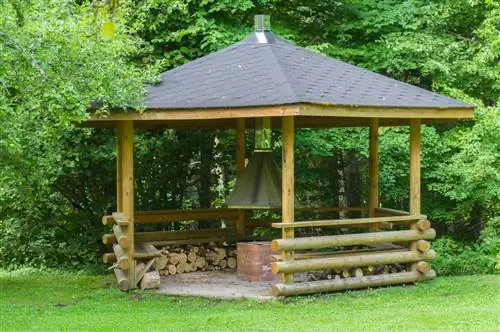
How to build a covered fire pit?
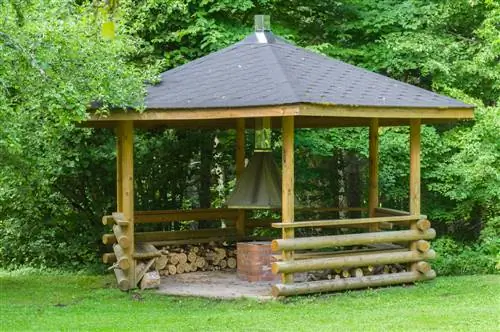
To build a covered fireplace, mark the area, dig holes for supports, set them in concrete, pave the area, and install a roof with a vent hole. Use weather-resistant hardwood or metal for materials.
Don't forget the trigger
There are a lot of building instructions for covered fireplaces on the Internet, but quite a few of them are incorrect: They don't have a vent above the fire. This can quickly become dangerous, especially with materials such as bamboo, wood or plastic. If the smoke and heat cannot escape, a large-scale fire will quickly develop. It is not enough that the sides of the covered fireplace are open; there must also be an exhaust hole in the roof itself - above the fireplace. So that smoke and heat can get out but the rain can't get in, the flue can also be made from two overlapping panels.
Building a covered fireplace - this is how it works
You can design a simple, covered fireplace with comfortable seating as follows:
- First measure the area required for the fire pit and a paved area.
- Mark these using string or spray paint.
- Now mark the positions of the four to six supporting legs of the roof outside this area.
- Dig the larger area about 30 centimeters deep.
- Fill the pit with sand or gravel.
- Position a concrete manhole ring in the middle.
- Now dig the holes for the legs.
- So that they stand securely, they should be set in concrete.
- This requires a foundation made of gravel or gravel below the support legs.
- If the legs are set in concrete, you can pave the area underneath.
- Finally, attach the roof to the roof using cross braces and angles.
- This consists of several plates that are attached overlapping in the middle.
- A hole should remain, but the overlap makes it rainproof.
Such a simple pavilion can be built from wood or metal. If you decide to use wood, only use weather-resistant hardwood, which you also coat with several layers of a protective glaze.
Tip
If you don't want to build it yourself or have two left hands, you can also buy ready-made barbecue pavilion kits (€193.00 on Amazon) in stores.

